Configure and Install VyOS virtual router for vSphere Lab
To successfully build and test functionalities / features of VMware vSphere, we need following networks in place. This will enable you to test features like vMotion, High Availability & VSAN.
Management Network
vMotion Network
VSAN Network
Uplink Network for North South communication
Since we do not have physical router to connect to, we will use VyOS open source router. This router will act as a TOR for our vSphere environment. In this blog, we will discuss step by step VyOS open source router configuration for VMware lab. This router will be used in all my VMware labs. To start with, I have a single physical ESXi host with following configuration…
2x Intel Xeon E5-2630 v4
Cores: 2x 10x 2.20 GHz (Dual 10 Core)
256 GB RAM
2x 1 TB SATA 7.2k RPM (Hardware RAID 0)
OS : VMware ESXi 6.7
Let’s begin the configuration,
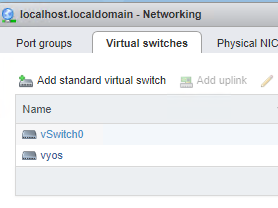
By default, An ESXi will have standard vSwitch0 with VM & Management Network port groups. No need to make any changes here.
Create one more standard switch name ‘VyOS’ with NO uplink.
Edit switch properties as follows…

Promiscuous Mode – Accept
MAC change – Accept
Forged Transmits – Accept
MTU can remain 1500 or can be changed as per your requirement.
Checkout VMware documentation for more information on switch properties.
Next step is to create VM port groups on newly created standard switch. The number of port groups will depend on the number of networks you want in nested lab. I wanted to build this lab vCloud Foundation, hence I created following port groups on VyOS router.

This is how it looks in physical ESXi.

One additional network called “Trunk” with VLAN ID 4095. This will act as a trunk port for all my nested ESXi hosts. A VLAN ID of 4095 represents all trunked VLANs. This will allow all VLAN traffic to and from nested ESXi.
At this stage, we are ready to install and configure VyOS router.
Download VyOS router ISO from https://downloads.VyOS.io/ OR from any other trusted sources.
Installing VyOS is straight forward like you create any other VM on an ESXi.
Create a VM- Name – OS Type – Storage Type- Attach ISO.
For networks, we need to add multiple network interfaces according to number of networks we want in our nested lab environment. Here is how it looks like after adding multiple interfaces. We don’t need to add interface for Trunk port group here, since it will be used by our ESXi severs.

Power On the VM and open console for further configuration.
Login with default user name “VyOS” and default password “VyOS”.

Install image on local disk so that we don’t loose the configuration upon reboot.

Type Yes

Type Auto and continue

Install image on SDA.

Type Yes & Hit Enter for default size option to start the installation.

Name the router and hit enter for Copy option.

Enter the new password for this router and default boot partition.

Installation complete. Power off the VM.
Detach the VyOS ISO from the VM and power it on again. Log in with new credentials and we are good to configure the router.
Check the interfaces on the router. “show interfaces”

This will be equal to network interfaces that you added while creating a VM.
We need to configure these interfaces.
Note: VyOS starts routing between all connected interfaces as soon as you configure them. There is no need of any additional configuration.
Get into configuration mode using ‘config’ command and set your interfaces.
set interfaces ethernet eth0 address 172.16.31.253/24
set interfaces ethernet eth1 address 172.16.32.253/24
set interfaces ethernet eth2 address 172.16.33.253/24
set interfaces ethernet eth3 address 172.16.34.253/24
set interfaces ethernet eth4 address 172.27.11.253/24
set interfaces ethernet eth5 address 172.27.12.253/24
set interfaces ethernet eth6 address 172.27.13.253/24
Set the description and & MTU of the interface.
set interfaces ethernet eth0 description VLAN-1631
set interfaces ethernet eth1 description VLAN-1632
set interfaces ethernet eth2 description VLAN-1633
set interfaces ethernet eth3 description VLAN-1634
set interfaces ethernet eth4 description VLAN-2711
set interfaces ethernet eth5 description VLAN-2712
set interfaces ethernet eth6 description VLAN-2713
set interfaces ethernet eth0 mtu 9000
set interfaces ethernet eth1 mtu 9000
set interfaces ethernet eth2 mtu 9000
set interfaces ethernet eth3 mtu 9000
set interfaces ethernet eth4 mtu 9000
set interfaces ethernet eth5 mtu 9000
set interfaces ethernet eth6 mtu 9000
Make sure to commit and save the configuration.

Check interfaces after configuration.

We have configured 7 networks here and .253 will act as a gateway in respective subnet in our nested environment. We are done with the basic configuration of the router here. This router will act as a TOR for our vSphere Environment.
Additional configuration needed for Internet Access in these networks…
Add one more network interface to VyOS (eth7), this interface will be connected to the ‘VM Network’ on ‘vSwitch0’ and NOT on the additional switch that we created. I will assign “151.100.100.100/29” network to eth7, since my physical ESXi is configured with this network and it has internet connectivity. And “151.100.100.233” as a gateway, since it is a gateway of my ISP as well as my physical ESXi.
Steps to configure on VyOS…
configure
set interfaces ethernet eth7 address 151.100.100.100/29
set interfaces ethernet eth7 description Internet
commit
save
set protocols static route 0.0.0.0/0 next-hop 151.100.100.233 distance 1
commit
save
set nat source rule 101 outbound-interface eth7
set nat source rule 101 source address ‘172.16.31.0/24’
set nat source rule 101 translation address masquerade
commit
save
This will enable internet access for all VM’s that gets connected to 172.16.31.0 network.
I will post more configuration commands in my upcoming posts. I hope this was helpful for you. Feel free to post comments if you find any difficulties in configuration.
Are you looking out for a lab to practice VMware products..? If yes, then click here to know more about our Lab-as-a-Service (LaaS).
Subscribe for my latest blogs…

I am now not certain the place you are getting your information, however great topic. I must spend some time finding out much more or working out more. Thank you for great info I used to be searching for this info for my mission.
LikeLiked by 1 person
Good to hear that you liked content on the blog. Keep going & let me know if you need any help. 🙂
LikeLike
I’m impressed, I need to say. Actually not often do I encounter a weblog that’s each educative and entertaining, and let me tell you, you have hit the nail on the head. Your concept is outstanding; the difficulty is one thing that not enough people are talking intelligently about. I’m very blissful that I stumbled throughout this in my search for one thing referring to this.
LikeLiked by 1 person
I am glad that the blog was helpful. Keep sharing & Keep Learning. 🙂
LikeLike
Great blog! Is your theme custom made or did you download it from somewhere? A design like yours with a few simple tweeks would really make my blog jump out. Please let me know where you got your design. Kudos
LikeLike
hey, thanks. I picked one from the default themes and added pics, its not custom made.
LikeLike
Thankyou for all your efforts that you have put in this. very interesting info .
LikeLiked by 1 person
You Are Welcome Majorie. Happy to share information. 🙂
LikeLike
You could definitely see your skills in the work you write. The world hopes for even more passionate writers like you who aren’t afraid to say how they believe. Always go after your heart.
LikeLiked by 1 person
Howdy! This post couldn’t be written any better! Reading this post reminds me of my good old room mate! He always kept talking about this. I will forward this page to him. Pretty sure he will have a good read. Many thanks for sharing!
LikeLike
hello,
why you named this VDS or it is VSS and not a VDS
LikeLike
Hello, This post talks about Standard Switch and not Distributed. I am not sure if i got your query, but please feel free to explain it in details. Thank you.
LikeLike
yes This post talks about Standard Switch and not Distributed. why you named it vds-vsan, vds-vmotion…
LikeLike
ohh yes. Got it. Because these port groups acts as a TOR configuration, which intern acts as a VDS port group in nested vCenter inside the lab. But yes, it can be named as VSS-PG since it gets created on VSS.
LikeLike
151.100.100.100 is the ip address assigned to eth7? not the gateway?
LikeLike
Yes. it is the IP add and not gateway. You should be able to ping this ip from your local machine after setting up the static route.
LikeLike