While working on NSX-T, you will want to add multiple users from Active Directory to manage your NSX-T environment. You can integrate up to 3 identity sources into your NSX-T env. Optionally, you can add VMware Identity Manager to authenticate users. In this post, we will cover AD integration with NSX-T.
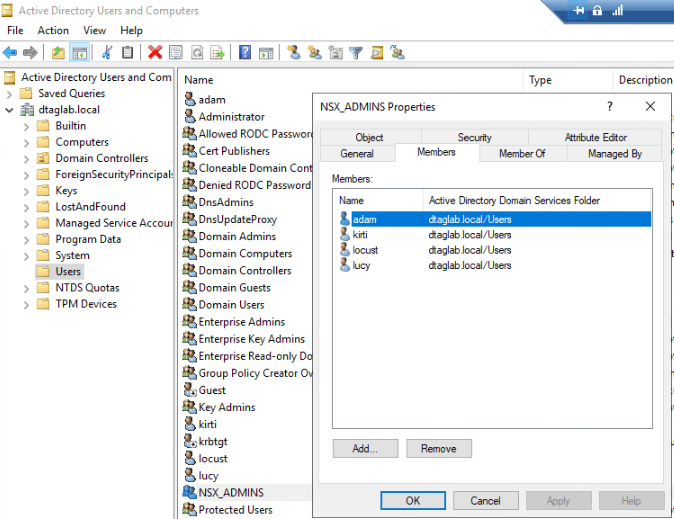
I have created ‘NSX_ADMINS’ Security Group in (Users OU) my Active Directory and added few users to it.
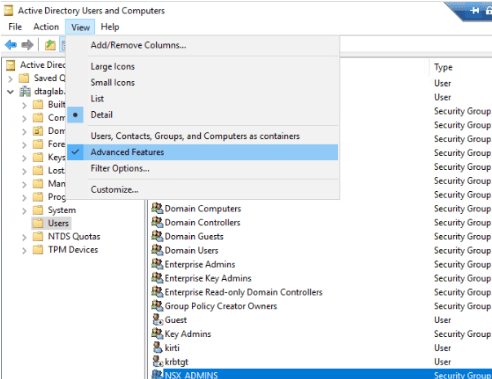
Next, Select ‘Users’ >View > Select Advance Features to get additional Attributes of ‘Users’ OU.
Right Click on ‘Users’ OU >Properties >Attribute Editor Tab.

View & Copy the ‘distinguishedName’ Value
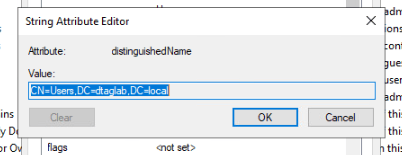
We need this value while configuring Identity Source in NSX-T.
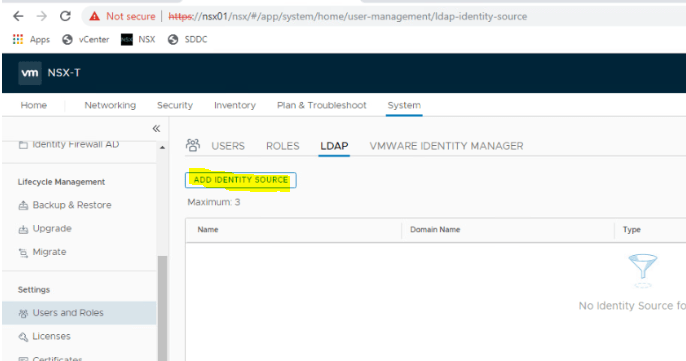
Next, Log into NSX-T Manager VIP with ‘admin’ account.

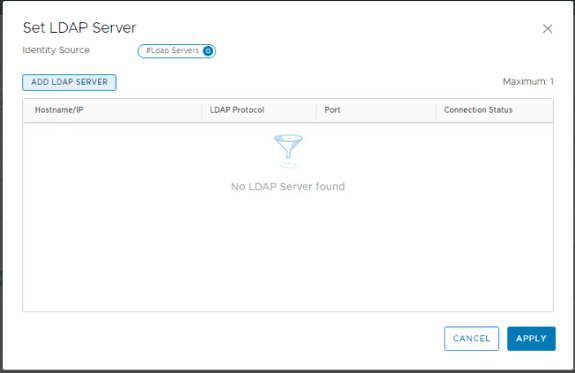
Navigate to System >Users & Roles >LADAP & Click on ‘ADD IDENTITY SOURCES’
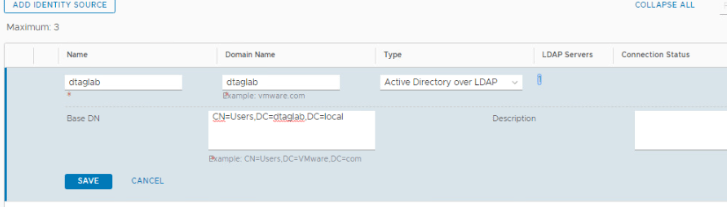
Name: DTAGLAB
Domain Name: dtaglab.local
Type: Active Directory over LDAP.
Base DN: Paste the value that copied earlier.
LADAP Server: Click on ‘SET’
Note: ‘SET’ will only populate when you fill entire information.

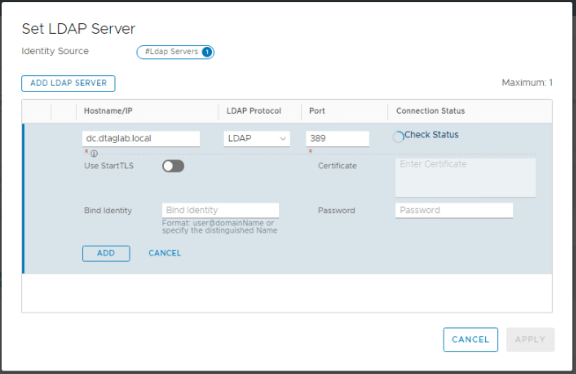
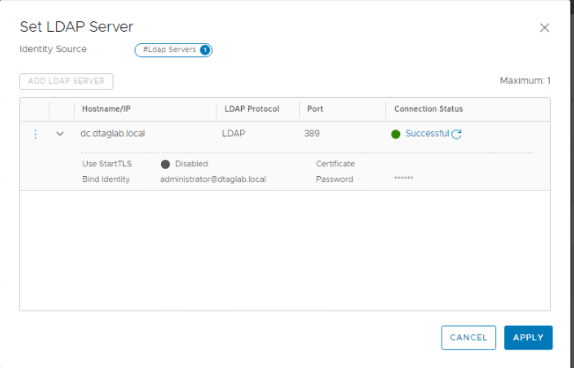
Click ADD LADAP SERVER
Hostname: dc.dtaglab.local
Protocol: LDAP
Port: Leave is to default.
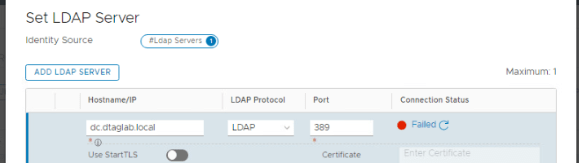
Click on ‘Check Status’
It Failed because we did not provide the username.
Note: Even though ‘Bind Identity’ & ‘Password’ does not show mandatory asterisk, it is mandatory for LDAP.
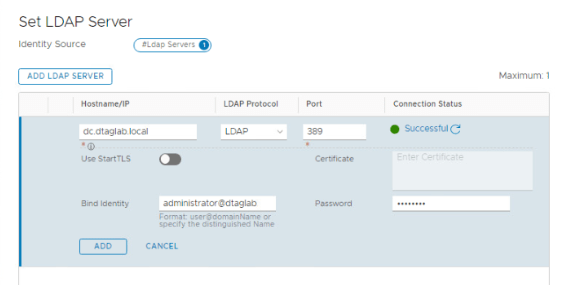
Provide the correct credentials and you should be good to go.
Click ADD
Apply.
Verify that the ‘LDAP SERVERS’ shows ‘1’ and click on SAVE.
Click on ‘Check Status’ in Connection Type to verify.
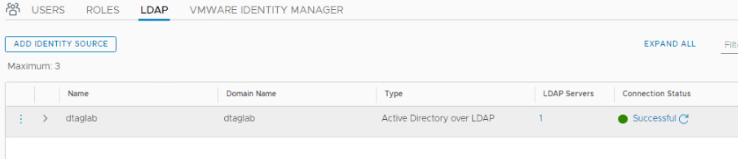
We have added an identity source in NSX-T.
Next, move to adding users / groups from ‘Users’ OU.
Click on ‘Users’

A message appears, ‘Çhecking Authentication providers connection status’. Wait for some time until message clears. Then click on ADD.
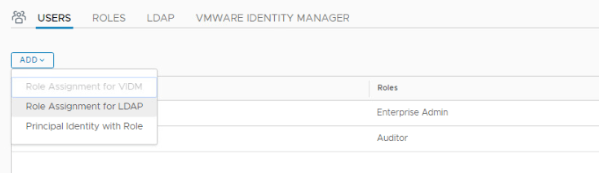
Note: ‘Role Assignment for LDAP’ does not show up until the above message clears.
Select your domain and type nsx in next box. The AD group will auto populate. Click on Roles and select ‘Enterprise Admin’ & SAVE.

We have added ‘NSX_ADMINS’ group to ‘Enterprise Admin’ role. Any user added to this group now gets full permission to NSX-T Env.

Logout and Log back in with the user in ‘NSX_ADMINS’ OU and you should be good to go.
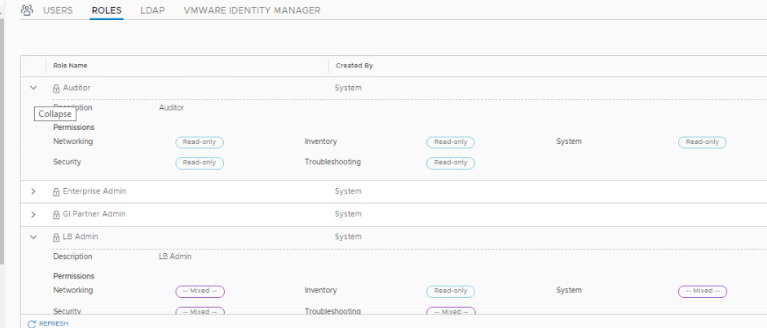
Additionally, NSX-T has built-in 11 Roles already added. Each Role has different permissions.

You can expand each Role to check what permissions it has.
That’s it for this post. Thank you for reading. 😊
Are you looking out for a lab to practice VMware products..? If yes, then click here to know more about our Lab-as-a-Service (LaaS).
Subscribe here to receive emails for new posts on this website.
