Just sharing a quick write-up on the error that I came across while working with VMware Aria Suite Lifecycle version 8.18 in my lab.
Error Code: LCMSOURCEMAPPING10018
Selected files checksums does not match with any product versions supported by VMware Aria Suite Lifecycle.
One or more selected files checksums does not match with any product versions supported by VMware Aria Suite Lifecycle: [/data/VMware-vRealize-Log-Insight-8.18.4.0-24842179 (1).ova]
VMware Aria Suite Lifecycle 8.18
VMware-vRealize-Log-Insight-8.18.4.0-24842179
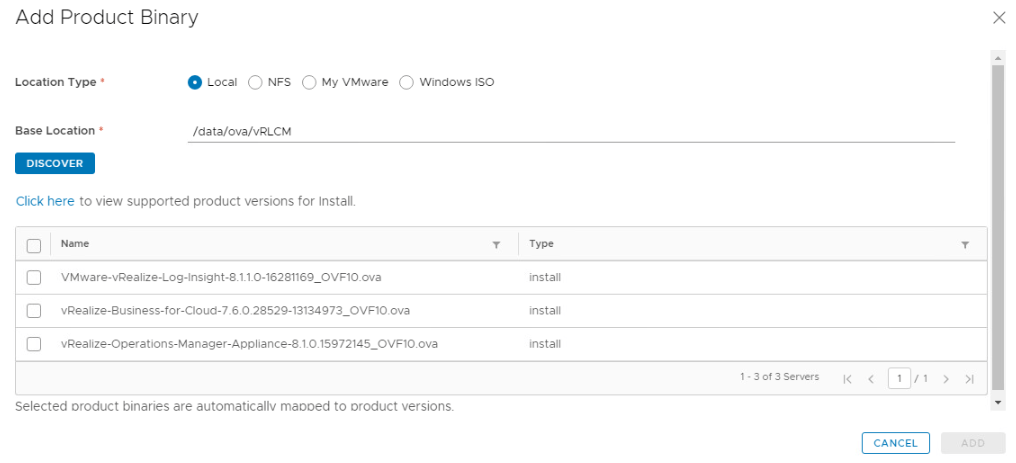
To deploy the log insight from Aria Suite (Formally known as vRLCM), you first need to upload vRLI binaries to vRLCM.
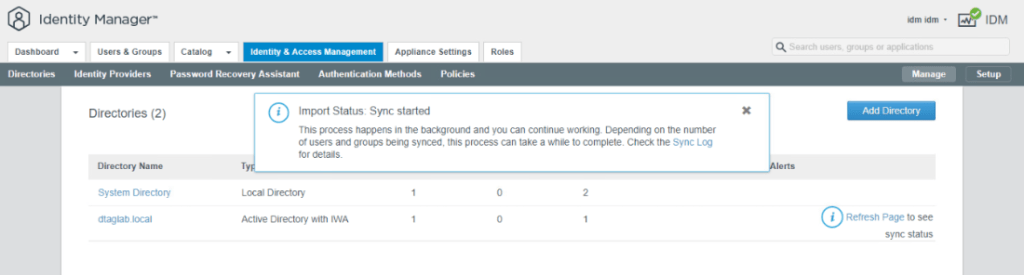
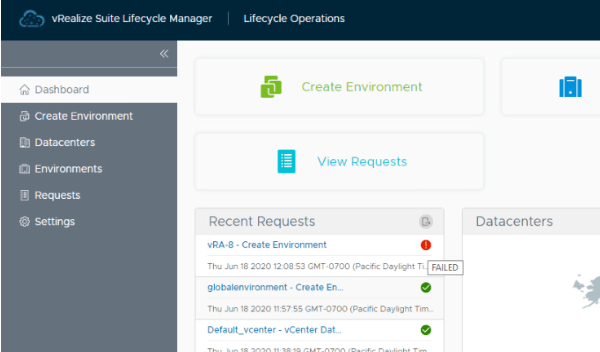
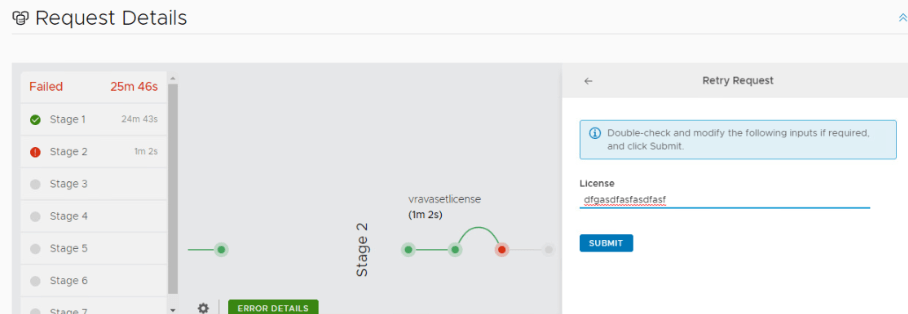
The source mapping error under requests in vRLCM

This is because of the supported version mismatch and missing product support pack or patch for vRLCM.
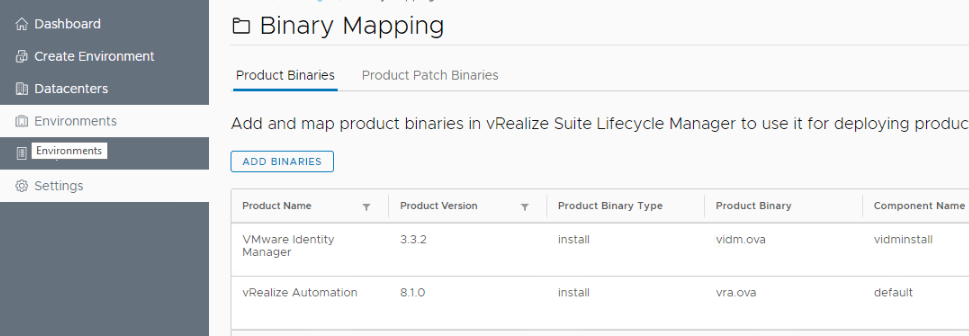
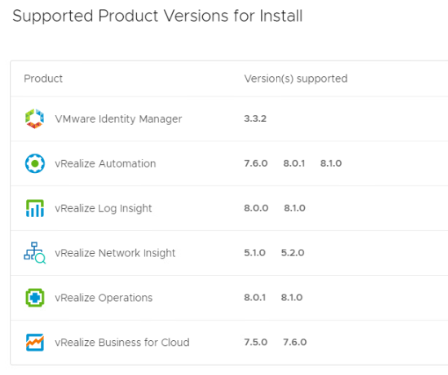
Go to Settings> Product Support Pack>

You will see the supported versions of the products that can be deployed from this instance of vRLCM
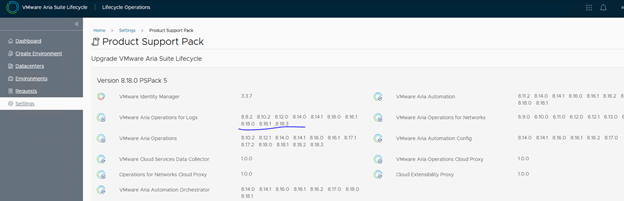
If you notice, for Logs, there is no 8.18.4 version listed. And the binaries that we are trying to upload is “VMware-vRealize-Log-Insight-8.18.4.0-24842179”
We need to get appropriate “product support pack” or patch installed to support this.
Following documentation detailed information on patches and packs needs to be installed.
Lets check the release notes for “VMware Aria Suite Lifecycle 8.18 Patch 3”
VMware Aria Suite Lifecycle 8.18 Patch 3 Release Notes
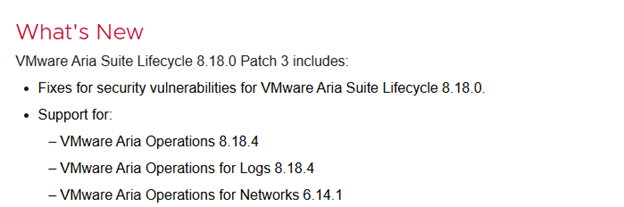
Patch 3 has added support for the version we are trying to install.
Let’s get the Patch 3 installed in our environment.
The following KB has detailed information on getting the patch downloaded and installed.
VMware Aria Suite Lifecycle 8.18 Patch 3 Installation Runbook
On high level, you need to download the script that is attached to KB and upload it to vRLCM under /data
Important Note: Take a snapshot of the VMware Aria Suite Lifecycle 8.18.x appliance

And run couple of commands to prepare vRLCM for patching,
cd /data
chmod +x prep-for-upgrade-lcm.sh
./prep-for-upgrade-lcm.sh

Once done, download the patch file from the support portal,
Download the patch
- Log in to the Broadcom Support Portal.
- Click My Downloads and choose VMware Aria Suite
- Click the Solutions tab and select VMware Aria Suite – Enterprise. Choose the 2019 release.
- On the list of Product Support Packs and Patches, filter to find the appropriate patch and click it to open the download page.
To search for a Patch, look for syntax in the format vrslcm-8.18.0-PatchX.patch , where X is the patch number.
Then winscp the downloaded file to vRLCM under /data,

Back to vRLCM> Settings> Product Binaries> Patch Binaries,
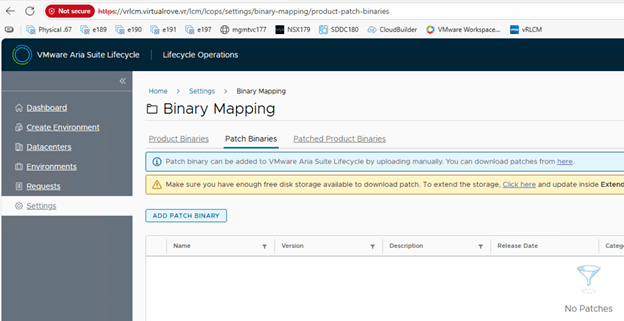
Click on Add Patch Binary> Enter the patch> Discover

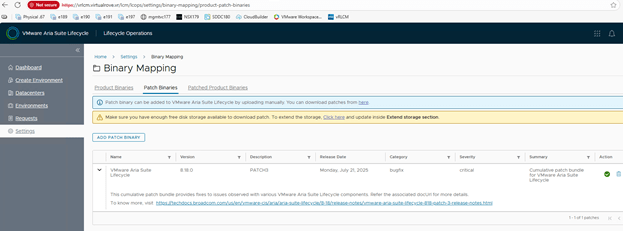
You should see the patch file. Select the patch file and add. Once done, check the recent requests,

Click on “In Progress” to check the status of the upload .

Once finished, Check the patch binaries,
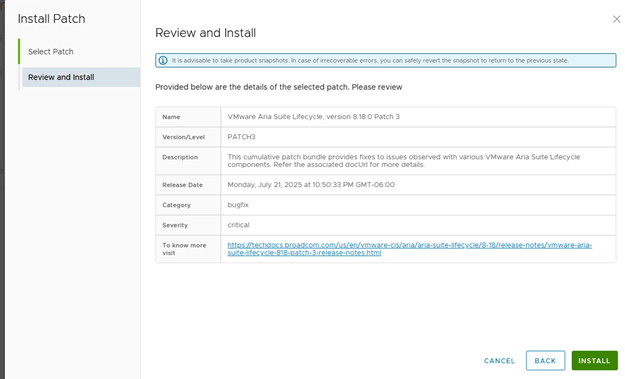
Time to install the patch.
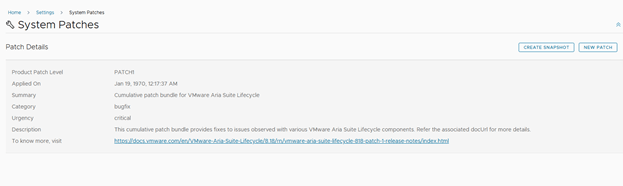
Settings> System Patches

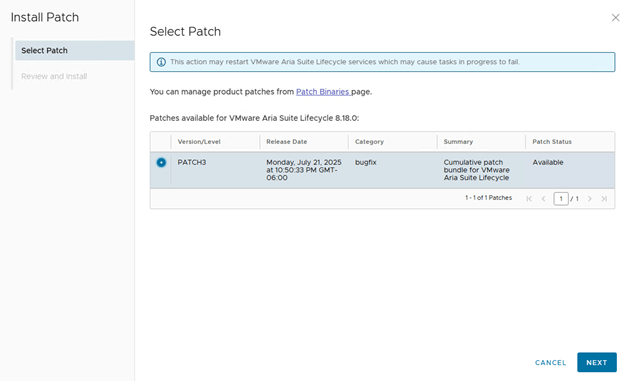
Click on “New Patch”
Select the patch and install.
Here is my existing patch version,

Installation of patch took around 30 mins with multiple reboots of vRLCM.
Check the version after the patch has been installed,

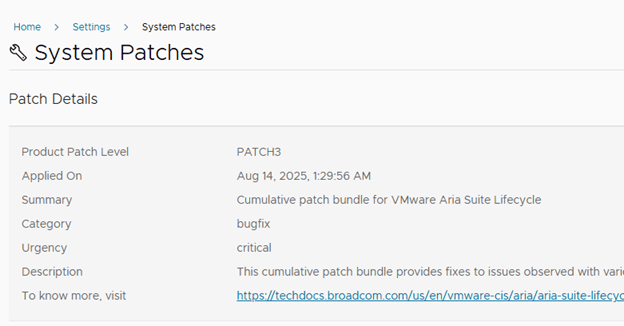
vRLCM has been patched.
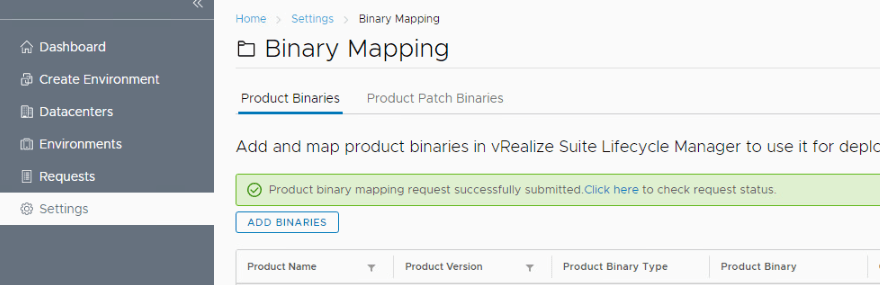
Lets try to add vRLI binaries now,


Source mapping request has been completed without any errors this time,
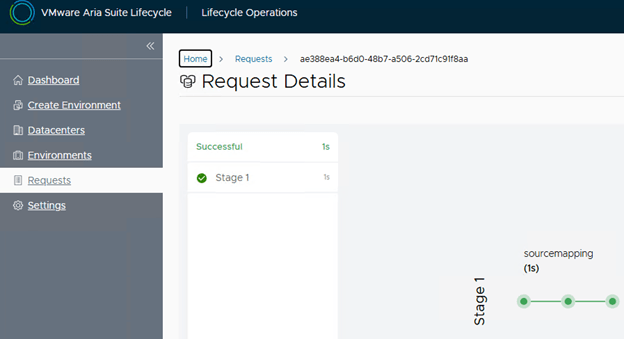
And we see all required binaries in the appliance and ready for installation,

Fun stuff,
Just wanted to put all this information at one place instead of checking multiple places for errors / steps. Hope this helps. Happy Learning. 😊
Are you looking out for a lab to practice VMware products…? If yes, then click here to know more about our Lab-as-a-Service (LaaS).
Leave your email address in the box below to receive notification on my new blogs.