I want to keep this one short, since it is part of parent topic here…
“NSX-T 3.1 – Backup & Restore_Production DR Experience – Part1”
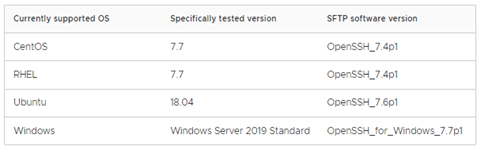
For NSX-T 3.1, following are supported operating systems as per the VMware documentation, however it also says that other software versions might work. SFTP is the only supported protocol for now.
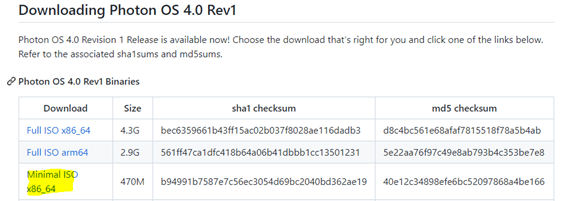
I remember having discussion with someone using VMware Photon OS for NSX-T backup. It is based on Linux OS and lightweight too. Does not consume many resources. Available for download at following location…
https://github.com/vmware/photon/wiki/Downloading-Photon-OS
Get the Minimal ISO…
Installation is straight forward. Just mount an ISO on a VM and follow the instructions to install it. Then we just run couple of commands to setup the VMware Photon OS.
Here is the screen capture of the commands that has been run to setup the sftp server.

Add the sftp user…
root@VirtualRove [ ~ ]# useradd siteA
Create backup directory…
root@VirtualRove [ ~ ]# mkdir /home/nsxbkp-siteA/
Add a group…
root@VirtualRove [ ~ ]# groupadd bkpadmin
Add a user in the group…
root@VirtualRove [ ~ ]# groupmems -g bkpadmin -a siteA
Set the password for user
root@VirtualRove [ ~ ]# passwd siteA
New password:
Retype new password:
passwd: password updated successfully
The chown command changes user ownership of a file, directory, or link in Linux
chown USER:[GROUP NAME] [Directory Path]
root@VirtualRove [ ~ ]# chown siteB:bkpadmin /home/nsxbkp-siteB/
root@VirtualRove [ ~ ]#
And that completes the configuration on Photon OS. We are good to configure this directory as backup directory in NSX-T.
Couple of things…
The Photon OS is not enabled for ICMP ping by default. You must run following commands on the console to enable ping.
iptables -A OUTPUT -p icmp -j ACCEPT
iptables -A INPUT -p icmp -j ACCEPT
Also, Root account is not permitted to login by default. You need to edit the ‘sshd_config’ file located at ‘/etc/ssh/sshd_config’
You can use any editor to edit this file…
vim /etc/ssh/sshd_config
Scroll it to the end of the file and change following value to enable ssh for root account…

Change the value from ‘no’ to ‘yes’ and save the file. You should be able to SSH to photon OS.
Let’s move to NSX-T side configuration.
Login to NSX-T VIP and navigate to System> Backup & Restore…
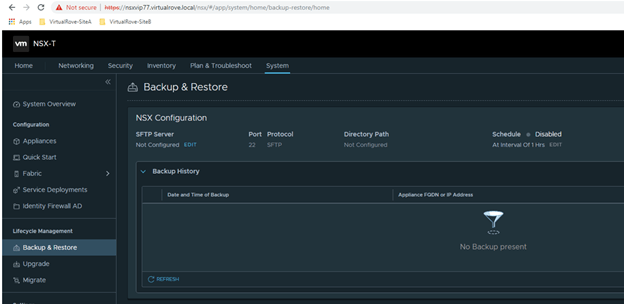
Click on Edit for SFTP server and fill in all required information.
FQDN/IP : is your sftp server
Port : 22
Path : We created this in our above steps.
Username, Password & Passphrase.
Save

It will prompt to add for Fingerprints.

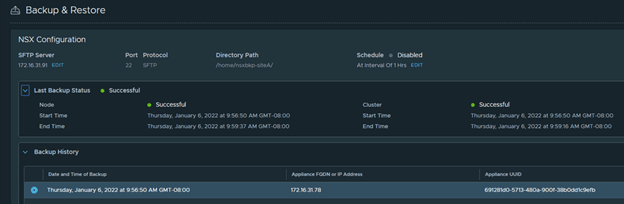
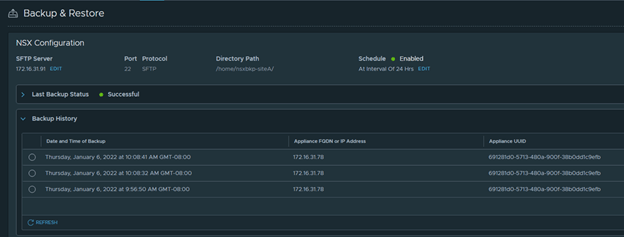
Click on ‘Start Backup’ once you save it.
You should see successful backup listed in the UI.
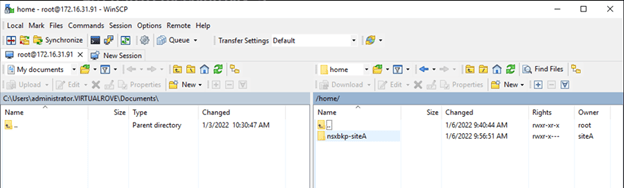
Additionally, you can use WinSCP to login to photon and check for backup directory. You should see recent backup folders.
You also want to set an interval to backup NSX-T configuration as pe the mentioned schedule.
Click on ‘Edit’ from NSX-T UI backup page and set an interval.
I preferred everyday backup, so I set it up to 24 hrs interval.

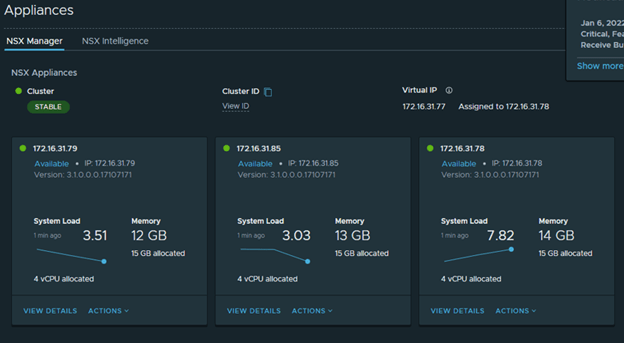
Check your manager cluster to make sure its stable.
And take a backup again manually.
That’s it for this post.
We have successfully configured SFTP server for our NSX-T environment. We will use this backup to restore it at DR site in case of site failure or in case of NSX-T manager failure for any reason.
Are you looking out for a lab to practice VMware products…? If yes, then click here to know more about our Lab-as-a-Service (LaaS).
Leave your email address in box below to receive notification on my new blogs.
