In the previous blogpost, we discussed NSX Manager installation and its requirements. Please find the links below for all posts in this series.
NSX 4.0 Series Part1-NSX Manager Installation
NSX 4.0 Series Part2-Add a Compute Manager & Configure the NSX VIP
NSX 4.0 Series Part3-Create Transport Zones & Uplink Profiles
NSX 4.0 Series Part4-Prepare Host Transport Nodes
NSX 4.0 Series Part5-Migrate workload from VDS To NSX
What is a Compute Manager…?
In simple words, vCenter is named as Compute Manager in NSX term.
NSX uses compute resources from the added compute managers to deploy management components. At the same time, it also fetches vSphere cluster information from vCenter / Compute Manager.
Let’s add a compute manager in our env.
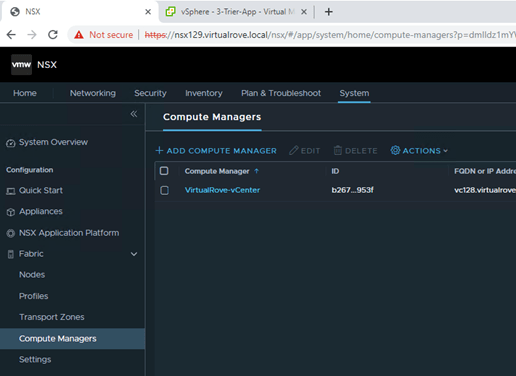
Login to 1st NSX manager and navigate to System > Fabric > Compute Managers >
Click on “Add Compute Manager”.
Fill in the required information here and click on Add.

You will be prompted to add the vCenter thumbprint. Click Add and Save. Here is how it will look after adding the compute manager.

Make sure that the compute manager is showing as Registered and its UP.

Important Note:
You can not remove a compute manager if you have successfully prepared ESXi host transport nodes & Edge nodes. You need to manually uninstall NSX from all ESXi host transport nodes and remove any edge nodes as well other components that got deployed from NSX before you try to remove a compute manager.
Next, we add 2 more NSX Managers in the env to form a NSX Cluster.
Why 3 NSX Managers…?
It’s a generic “Cluster” definition in IT world. Each cluster has a Quorum. And NSX Cluster too requires a quorum. Which means, 2 of its 3 members should be up at a given time for NSX env to function / operate properly.
So,
1 NSX Manager is single point of failure.
2 NSX Managers cannot full fill the cluster quorum definition / requirement since generic definition always refers to additional witness node in 2 node cluster configuration.
3 NSX Manager is perfect number to form a cluster.
Hence, 3 NSX Managers, Place them on 3 different physical ESXi nodes and configure anti-affinity to avoid two managers being on single esxi node.
Since it’s a lab env, We will not be deploy remaining 2 appliances. However, here is the link if you want to deploy 2 more appliances.
Next, we configure the VIP (Virtual IP) for NSX Cluster.
What is a VIP…?
A NSX cluster VIP is virtual ip that gets assigned to the cluster. A VIP redirects all requests to master / leader node from the cluster.
When we create a NSX cluster (usually 3 nodes), one of the node gets elected as mater / leader node. Any API and UI request coming in from clients is directed to the leader node. If Leader node is down for any reason, the cluster mechanism automatically elects new leader and all requests gets forward to new leader from the VIP. You also have to make sure that all NSX managers are deployed in the same subnet.
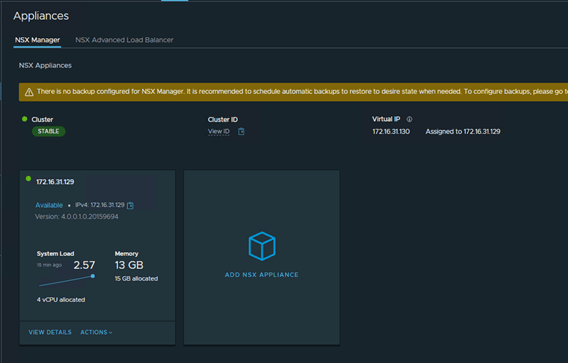
Login to 1st NSX Manager and navigate to System> Appliances…
I only have a single NSX manager in my lab environment. Make sure that the health of the Cluster is “Stable”.

Click on “SET VIRTUAL IP”
Enter the IP address and hit save.

It may take several minutes to add the VIP and NSX GUI might not be accessible for couple of minutes until all required services are up and running.
I see that the VIP has been configured and it is assigned to available NSX manager in the cluster.
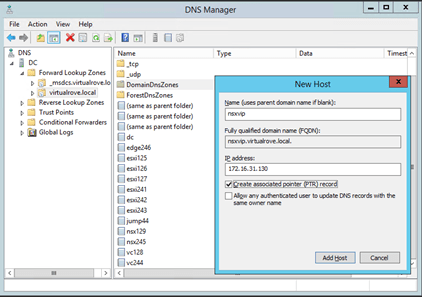
I have also created a DNS record for the VIP. Going forward, we will be using this FQDN to access NSX UI.
Let’s login to NSX using VIP and make sure that the state is “Stable”.

All looks good. Let’s move to the next step to prepare Host Transport Nodes for NSX.
That’s all for this post.
I hope that the blog has valuable information. See you all in the next post.
Leave your email address in the box below to receive notification on my new blogs.
Are you looking out for a lab to practice VMware products…? If yes, then click here to know more about our Lab-as-a-Service (LaaS).
