Welcome back readers.
Please find the links below for all posts in this series.
NSX 4.0 Series Part1-NSX Manager Installation
NSX 4.0 Series Part2-Add a Compute Manager & Configure the NSX VIP
NSX 4.0 Series Part3-Create Transport Zones & Uplink Profiles
NSX 4.0 Series Part4-Prepare Host Transport Nodes
NSX 4.0 Series Part5-Migrate workload from VDS To NSX
Our NSX env is fully functional and we are ready to migrate workload from vCenter VDS to NSX env.
It’s always a good practice to verify the NSX env before we start working on it.
Login to NSX VIP and look for Alarms,
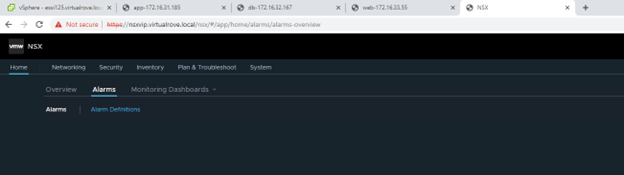
Check the cluster status,

And then look for host transport nodes if they are showing host status as UP,

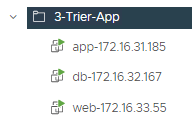
For testing purposes, I have created 3 windows vm’s. All three vm’s connects to 3 different port groups on vCenter VDS. We will move these VM’s from vCenter VDS to NSX managed segments.
Following are test VM’s with their respective vds port groups. I have named these VM’s according to PG.

Next, we need to create Segments in NSX env. A Segment is nothing but the portgroup.
Let’s have a look at the types of Segments.
VLAN Baked Segments: In this type, you will define a VLAN ID for the segments, however you also have to make sure that this vlan configure exists on your physical top of the rack switch.
Overlay Backed Segments: This segment can be configured without any configuration on the physical infrastructure. It gets attached to Overlay Transport Zone and traffic is carried by a tunnel between the hosts.
As stated earlier, we would be only focusing on VLAN backed segments in this blogpost. Visit the following blog if you are looking for overlay backed segment.
Login to NSX and navigate to Networking> Segments,

Oops, I haven’t added license yet. If you do not have a license key, please refer to my following blog to get the eval licenses.
Add the license key here,
System> Licenses,

Then we move to create a VLAN backed segment in NSX. You can create vlan backed segments for all networks that exist on your TOR (top of the rack switches). For this demo, I will be using Management-1631, vMotion-1632 and VSAN-1633 networks.
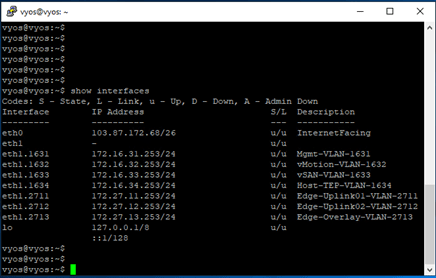
In my lab env, following networks are pre-created on the TOR.
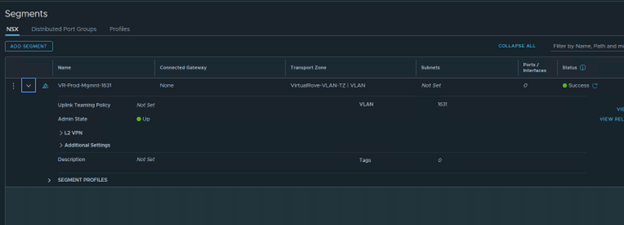
Login to NSX VIP> Networking> Segments> Add Segment

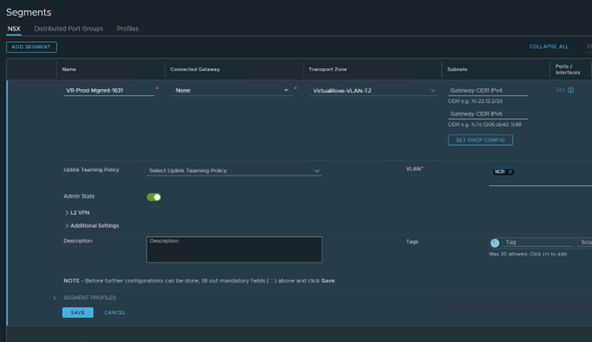
Name: VR-Prod-Mgmnt-1631
Transport Zone: VirtualRove-VLAN-TZ (This is where our esxi host transport nodes are connected)
VLAN: 1631
SAVE
Verify that the Segment status is Success.
Once the segment is created in NSX, go back to vCenter and verify if you see the newly created segment. You will see a letter “N” for all NSX create segments.

Click on the newly created Segment.
Note that the Summary section shows more information about the segment.

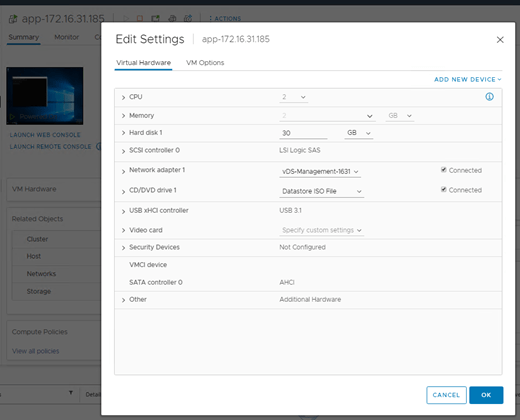
We will now move a VM called “app-172.16.31.185” from VDS to NSX.
Source VDS portgroup is “vDS-Management-1631”
Destination NSX Segment is “VR-Prod-Mgmnt-1631”

Verify that it is connected to VDS portgroup.
Login to the VM and start a ping to its gateway IP.

Login to the vCenter> Networking view> Right Click the source port group>
And select “Migrate VM’s to another network”.

In the migration wizard, select newly created NSX vlan backed segment in destination network,

Select the VM that needs to be migrated into the NSX env,

Review and Finish,

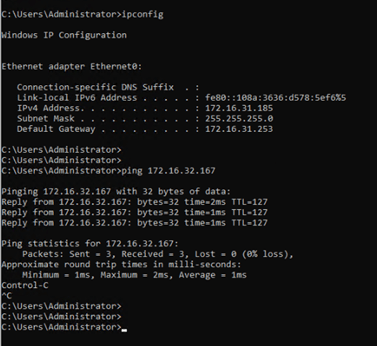
Monitor the ping command if we see any drops.

All looks good. NO ping drops and I can still ping to the vm ip from other machines in the network.
We have successfully migrated a VM into the NSX env.
Verify the network name in VM settings,

Click on the NSX segment in vCenter and verify if you see the VM,

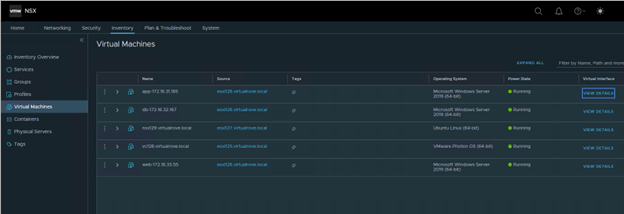
You can also verify the same from NSX side,
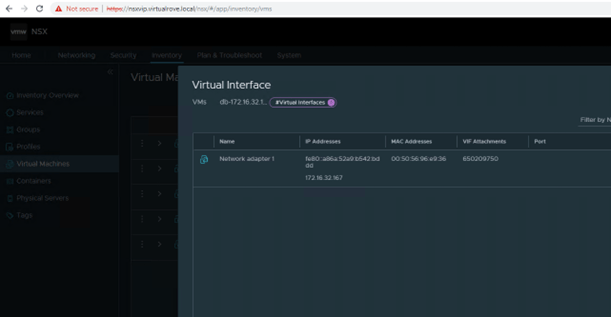
Login to NSX> Inventory> Virtual Machines> Click on View Details for the VM that we just migrated,
You will see port information in details section,

You will not see port information for db vm, since it has not been migrated yet.
Remaining VM’s have been moved into the NSX env. Ports column shows “1” for all segments.

We see all 3 NSX segments in vCenter networking view,

Simple ping test in cross subnets. From App To DB,
Well, all looks good. Our workload has been successfully migrated into NSX env.
So, what is the use case here…?
Why would customer only configure vlan backed segments…?
Why No overlay…?
Why No T1, T0 and Edge…?
You will surely understand this in my next blog. Stay tuned. 😊
Hope that this blog series has valuable information.
Are you looking out for a lab to practice VMware products…? If yes, then click here to know more about our Lab-as-a-Service (LaaS).
Leave your email address in the box below to receive notification on my new blogs.
