VMware NSX-T 3.0 is a newly launched product version of NSX-T. It is highly scalable network virtualization platform. Unlike NSX-V, it can be configured for multi-hypervisor & workloads running in public could. This blog is divided into series of parts, which will help you to successfully install and configure NSX-T 3.0 environment. Like my other blogs, even this blog will focus on practical with limited theoretical information. Here is the VMware official documentation for your reference.
https://docs.vmware.com/en/VMware-NSX-T-Data-Center/index.html
With that lets get started…
I have nested vSphere 7 and VSAN 7 configured in my existing setup. I will use this lab to deploy and configure NSX-T env.
This series of NSX-T 3.0 includes following parts.
NSX-T 3.0 Series: Part1-NSX-T Manager Installation
NSX-T 3.0 Series: Part2-Add additional NSX-T Manger & Configure VIP
NSX-T 3.0 Series: Part3-Add a Compute Manager (vCenter Server)
NSX-T 3.0 Series: Part4-Create Transport Zones & Uplink Profiles
NSX-T 3.0 Series: Part5-Configure NSX on Host Transport Nodes
NSX-T 3.0 Series: Part6-Depoy Edge Transport Nodes & Create Edge Clusters
NSX-T 3.0 Series: Part7-Add a Tier-0 gateway and configure BGP routing
NSX-T 3.0 Series: Part8-Add a Tier-1 gateway
NSX-T 3.0 Series: Part9-Create Segments & attach to T1 gateway
NSX-T 3.0 Series: Part10-Testing NSX-T Environment
Let’s start with Part1-NSX-T Manager Installation.
NSX Manager provides a web-based UI to manage your NSX-T env. Let’s check the NSX Manager VM form factor and its compute requirements.

Procedure:
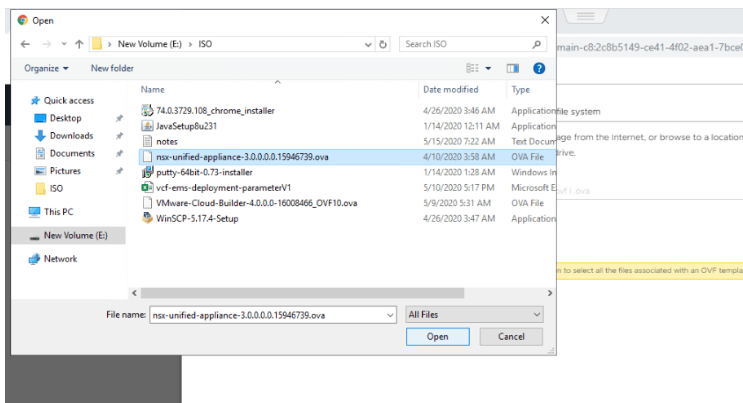
Obtain NSX-T Data Center OVA file from VMware downloads and deploy it into your vSphere env.

Upload the downloaded OVA file here.

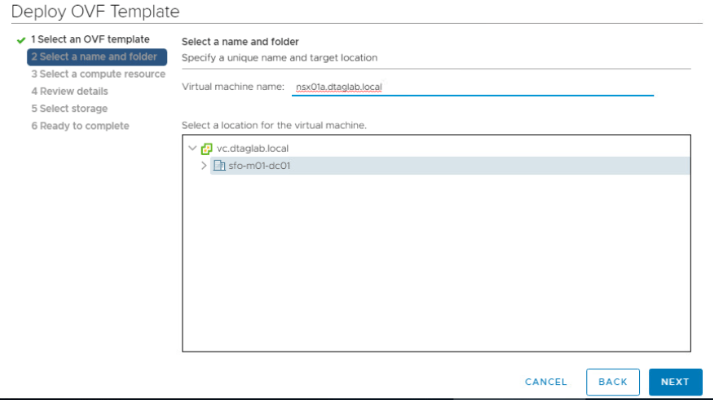
Select appropriate name and location of the VM.

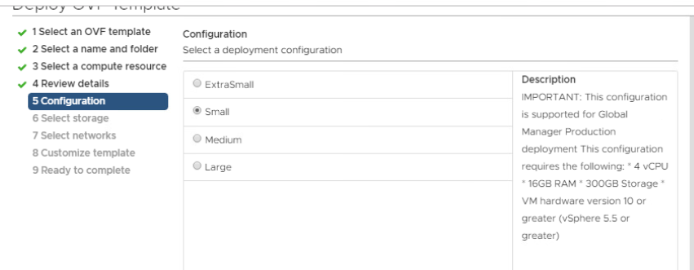
Select the form factor here.
Storage

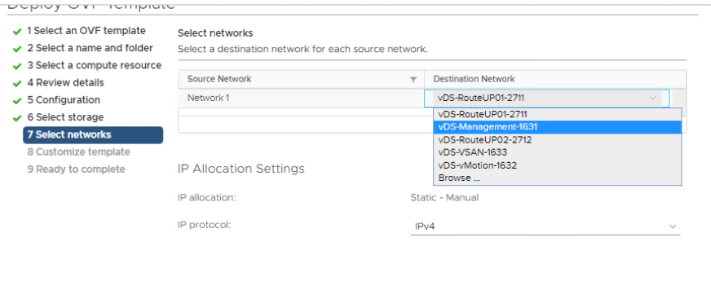
Select your management network here.
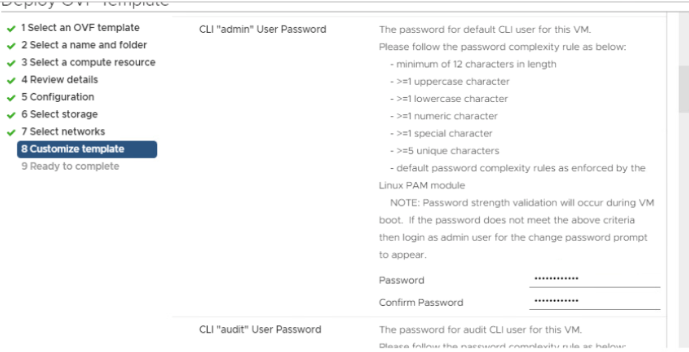
Enter the password for Root and Admin user. Make sure your password meets the complexity rule or the deployment will fail.
Fill out network and DNS info. Make sure to create a DNS record for your FQDN. Leave the Role name to default.

No need to fill anything here.

Next & Finish.
Browse to the NSX Manager FQDN once it is up and running. We are good to configure it further. That’s it for this post.
Share it if you like it.
Are you looking out for a lab to practice VMware products..? If yes, then click here to know more about our Lab-as-a-Service (LaaS).
Subscribe for my latest blogs…
