Time to configure Network Profiles in this post. Refer to my previous posts on vRA8.1 here.
VMware vRealize Automation 8.1 – Part1: Cloud Assembly & Service Broker
VMware vRealize Automation 8.1 – Part2: Cloud Accounts, Projects & Cloud Zones
VMware vRealize Automation 8.1 – Part3: Flavor Mapping & Image Mapping
VMware vRealize Automation 8.1 – Part4: Network Profiles
VMware vRealize Automation 8.1 – Part5: Blueprints
VMware vRealize Automation 8.1 – Part6: Content & Catalog
VMware vRealize Automation 8.1 – Part7: User Permissions, Roles & Branding
Network Profile: A network profile defines a group of networks and network settings that are available for a cloud account. Basically, you define a network properties for target deployment. You can define an existing network to use IP address values that are obtained from, and managed by, an external IPAM provider rather than internally from vRealize Automation.
Log into vRA portal> Infrastructure> Network Profiles> New Network Profile.

In the summary tab, Select Cloud Account, Name & Description.

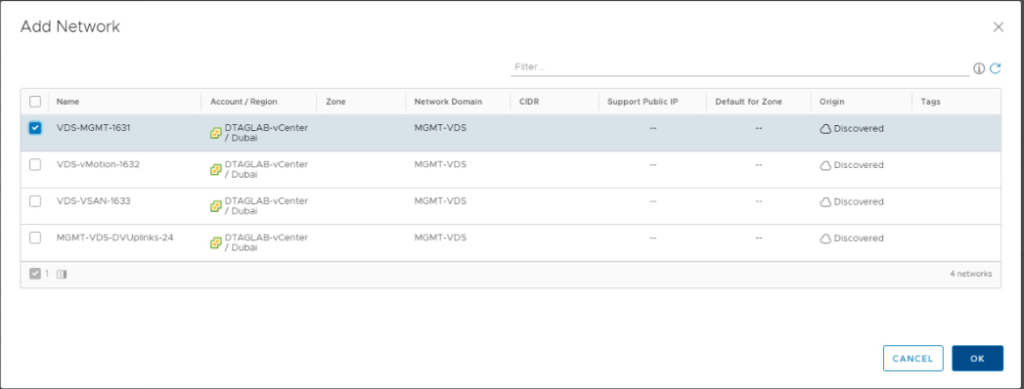
Click on Networks Tab> Add Network

You see all your networks that are discovered by vRA from the added Cloud Account.
Select the network that you want your VM’s get after the deployment.
Create

Now, we have to define IP ranges from the selected network. To do that, certain parameters for the discovered networks should be in place (i.e. CIDR, gateway etc).
Note: You will not be able to create IP ranges until you enter these properties for selected network.
Infrastructure> Resources> Networks> Select the Network that we added earlier.

Fill the Domain, CIDR & Gateway Information.
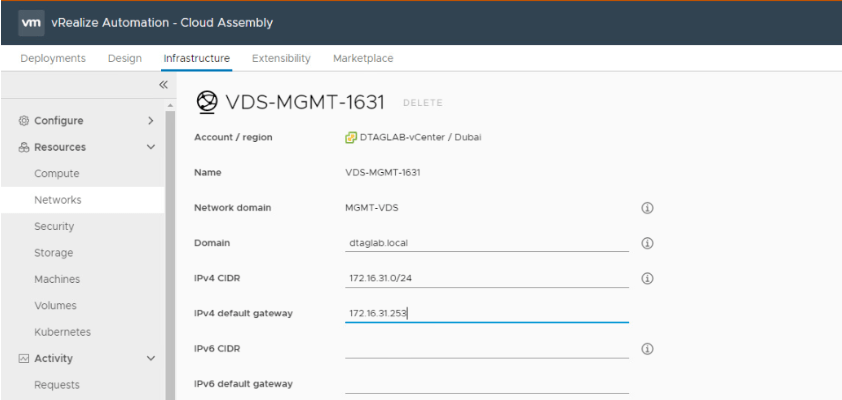
Scroll down to enter DNS information.
Make sure to check the box for ‘Default for zone’. So that this network will be used when we deploy the blueprint.
Save.

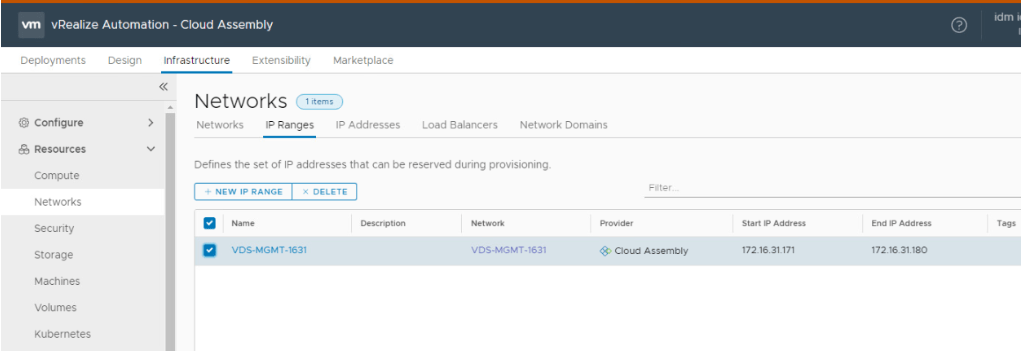
Time to create IP Ranges.
Infrastructure> Resources> Networks> IP Ranges> New IP Range

Select your network from the dropdown. You will only see the network, that have CIDR and other mandatory parameters set.

Enter Name, Start & End IP > ADD.

IP Range for 1631 network has been created. These IP’s will be used by deployment.
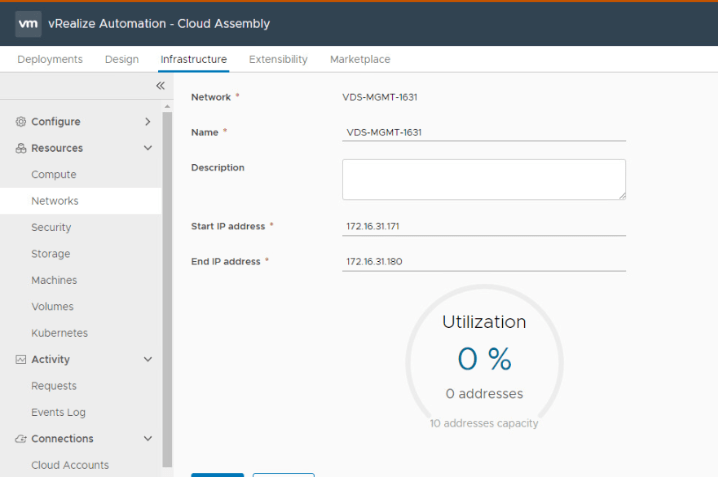
If you click on the IP Range again, you see the utilization of the pool.
We have created network profile and all other required network components needed by the blueprint. Its time to create Blueprint. My next post will focus on the deployment of the blueprint.
Thank you for reading. Good Day.
Are you looking out for a lab to practice VMware products..? If yes, then click here to know more about our Lab-as-a-Service (LaaS).
Leave your email address in below box below to receive notification on my new blogs.
