We talked about registering VCF Operations on the Broadcom Portal and applying licenses to VCF Operations. Let’s continue and apply new licenses to vCenter and VSAN.
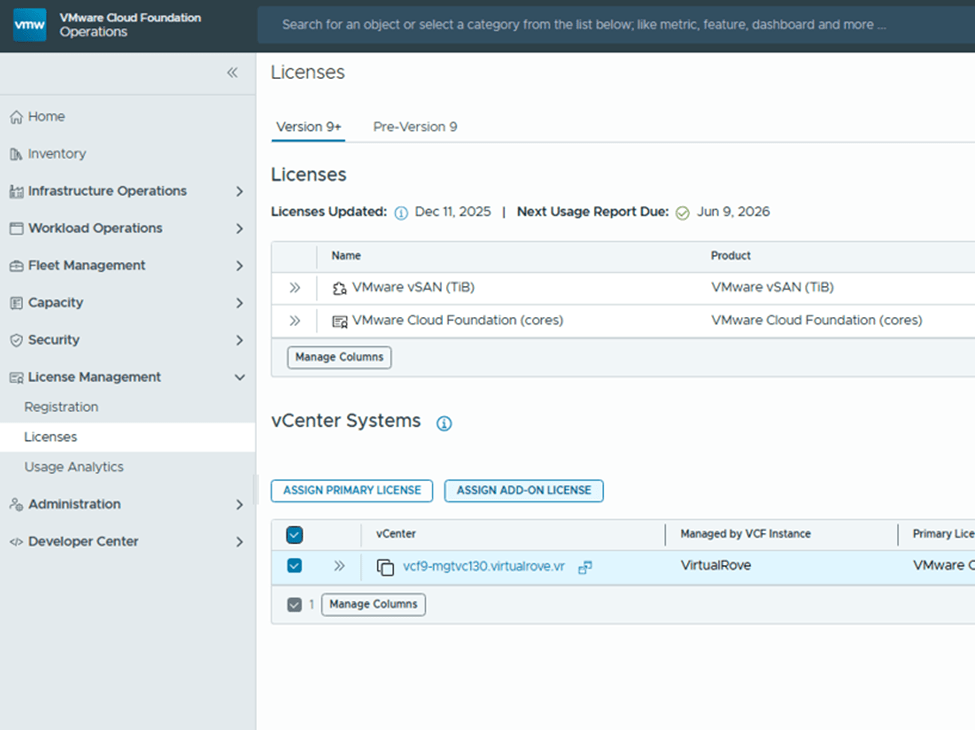
Click on Licenses> Assign Primary License
Select the VCF license and assign,
vCenter is fully licensed,
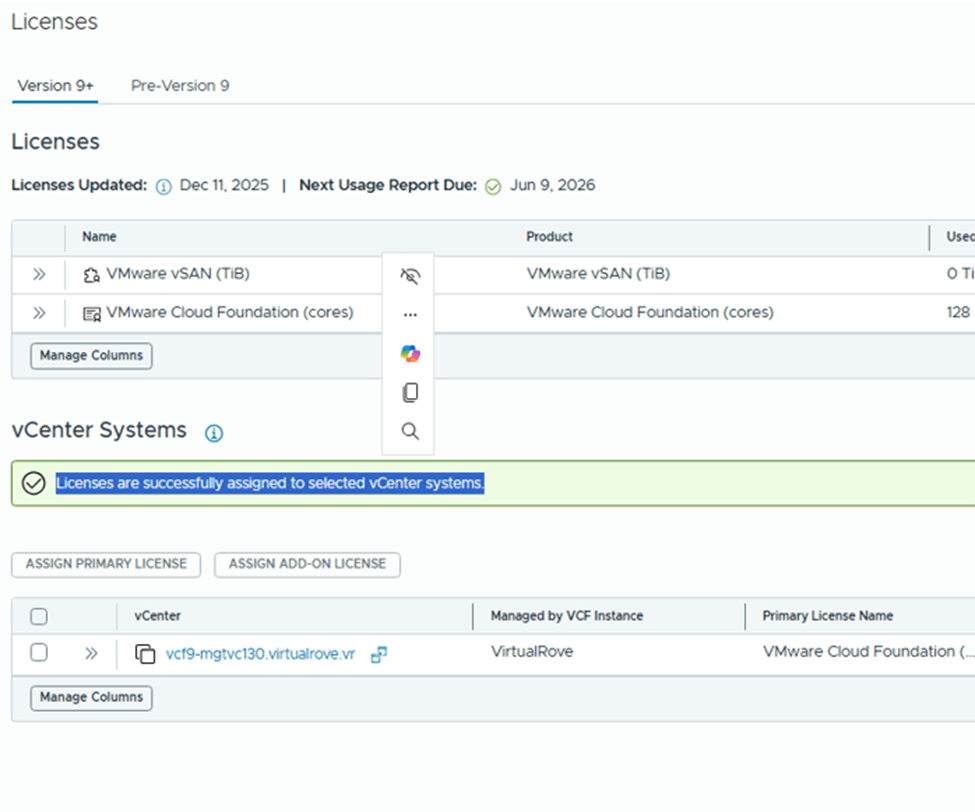
Back to licenses, Select vCenter and click on “Add-on license”
Select VSAN license and assign,
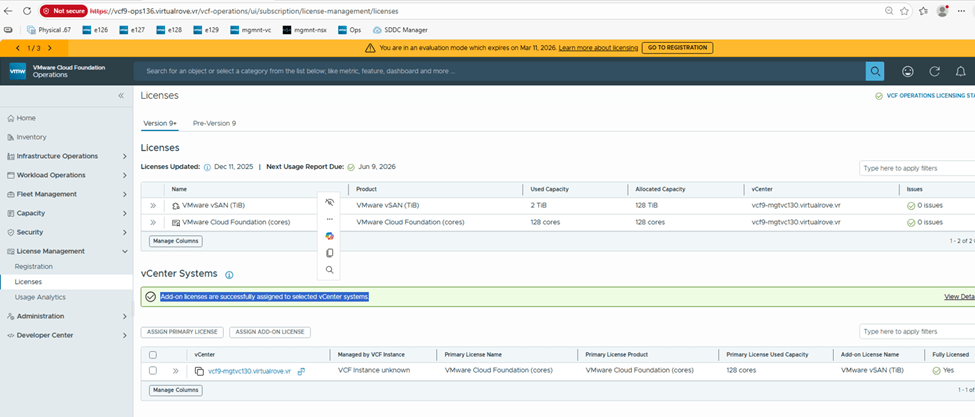
Add-on license applied successfully and vCenter is fully licensed,
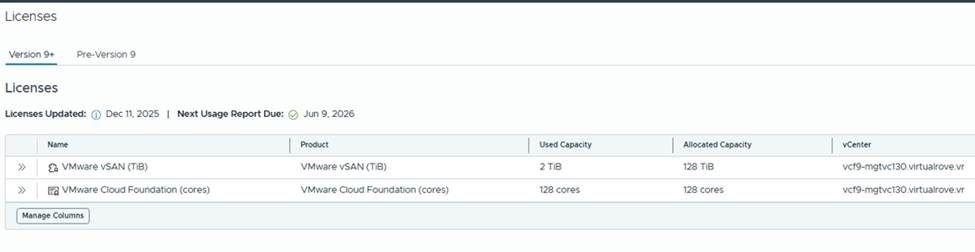
Check the “Used Capacity” in license section,
vCenter shows fully licensed,
Here is the link for official documentation on VCF 9 licensing,
That’s it for this post. We have licensed entire VCF 9 environment. Please refer to official documentation & make sure to update license usage every 180 days. 😊
Licenses are version-agnostic, eliminating version-based key mismatches
Managed centrally through VCF Operations and the VCF Business Services (VCFBS) portal
Designed for both connected mode (auto-reporting) and disconnected mode (manual uploads every 180 days)
Let’s dive deeper into it. I have freshly deployed VCF 9 environment.
After you deploy the env, it operates in evaluation mode for up to 90 days. During that period, you must license your environment.
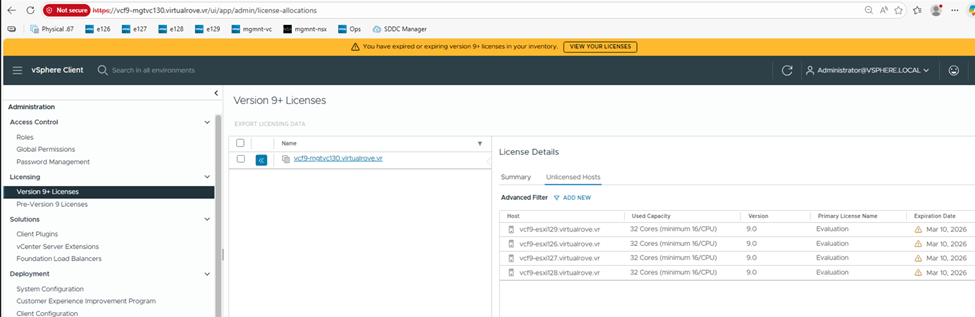
Here are details for one of the esxi from the env,
As you can see, I have 2 physical sockets on this esxi and cores per socket are 4. That sums up to 8 CPU cores. However, when it comes to license calculation, it by default calculates 16 cores per socket even if I just have 4 cores per socket.
So, total number of licensed core on this esxi would be 32 cores.
I have 4 esxi hosts in this management workload domain cluster, so the total number of licensed cores would be (4*32) 128 cores.
Primary licenses apply only to ESXi hosts by count of physical CPU cores, with a 16-core minimum per CPU.
Moving to add-on license. This applies to vSAN Capacity in TiB’s. And the formula is, 1 TiB per licensed core. In my case, I will have 128 TiB allowed storage since I have 128 cores. For storage-heavy use cases, you need to purchase additional vSAN add-on capacity license.
Maintaining license compliance now includes periodic usage reporting: Connected Mode (Internet Connection Required): VCF Operations sends usage data automatically each day; updates required every 180 days
Disconnected Mode (Dark Site): Manually download, upload, and activate new license files every 180 days
Failure to report can place hosts into expired status—preventing workloads until remedied. Basically, all hosts gets disconnected and you cannot start any vm. ☹
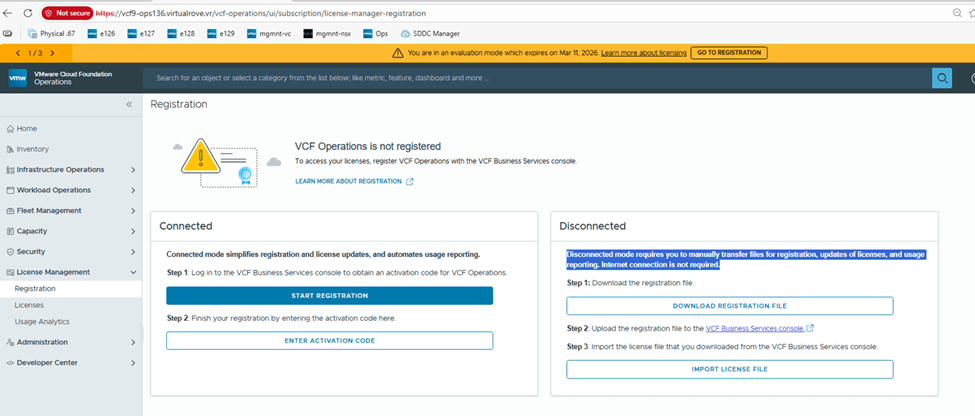
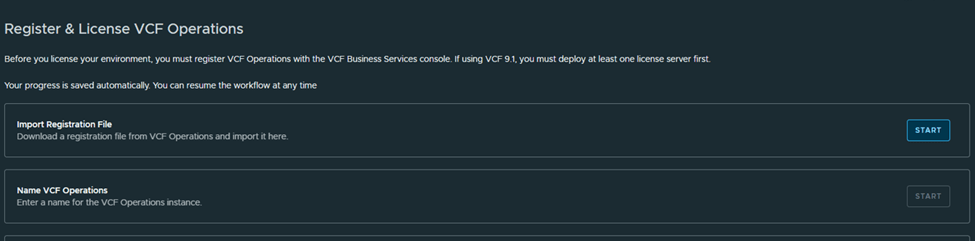
Let’s go to Ops> License Management> Registration
I will be demonstrating “Disconnected” mode for this blog.
Starting with version 9.0, the licensing model is the same for VCF and vSphere Foundation. You assign licenses only to vCenter instances. The other product components, including ESXi hosts, that are connected to the licensed vCenter instances, are licensed automatically.
You no longer license individual components such as NSX, HCX, VCF Automation, and so on. Instead, for VCF and vSphere Foundation, you have a single license capacity provided for that product.
For example, when you purchase a subscription for VCF, with the license you receive and assign to a vCenter instance, all components connected to that vCenter instance are licensed automatically.
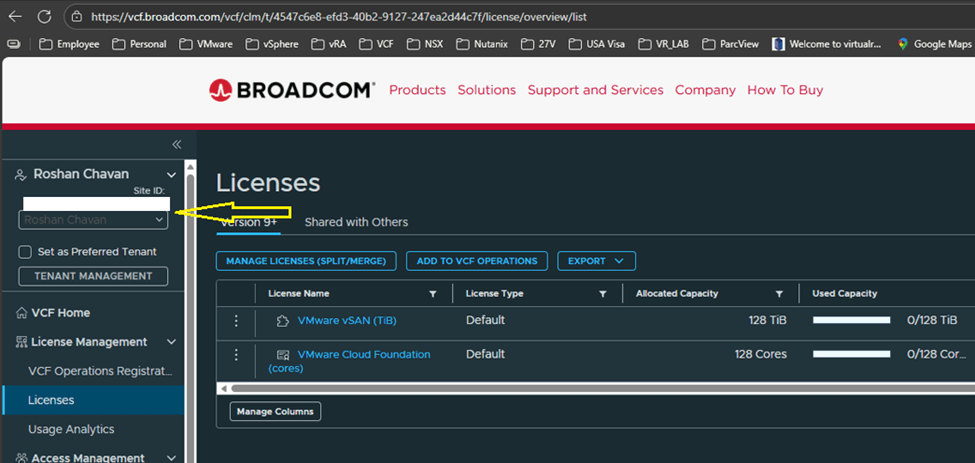
Switch the site ID and make sure it is correct one and click on License,
I have vmug licenses which are already showing up on the portal with my vmug entitlement.
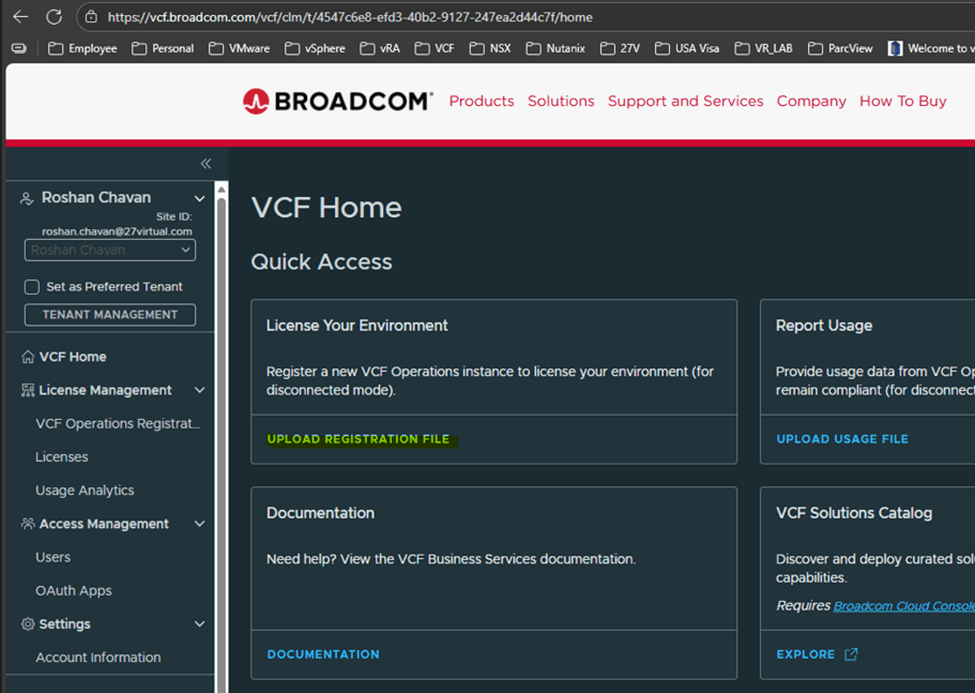
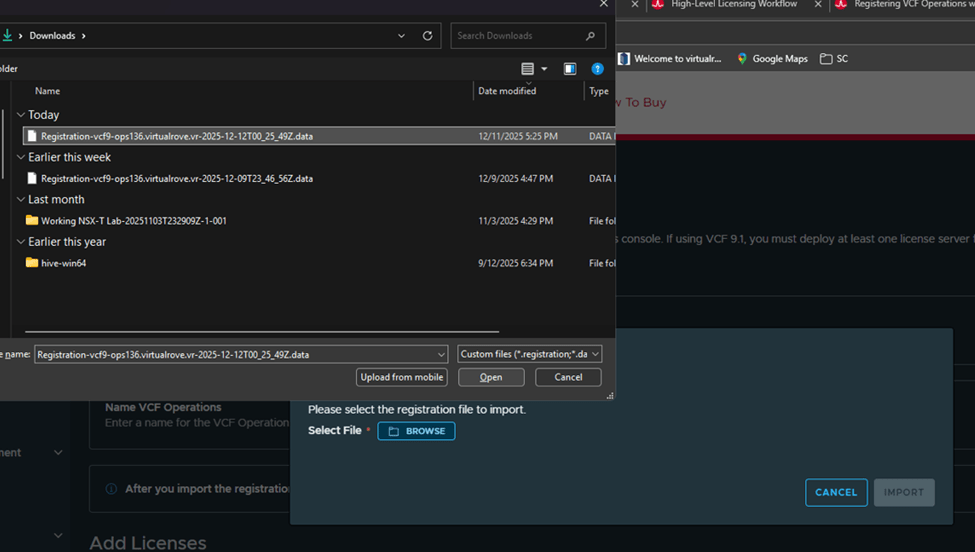
Back to VCF Home page on the portal, Click on “Upload registration file”
Upload the file that we downloaded earlier,
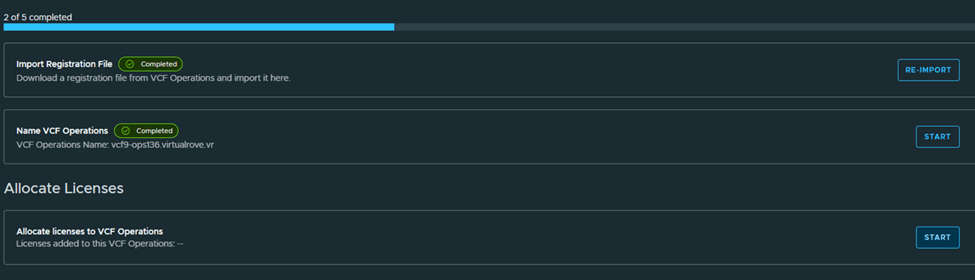
Next, Name the VCF Operations,
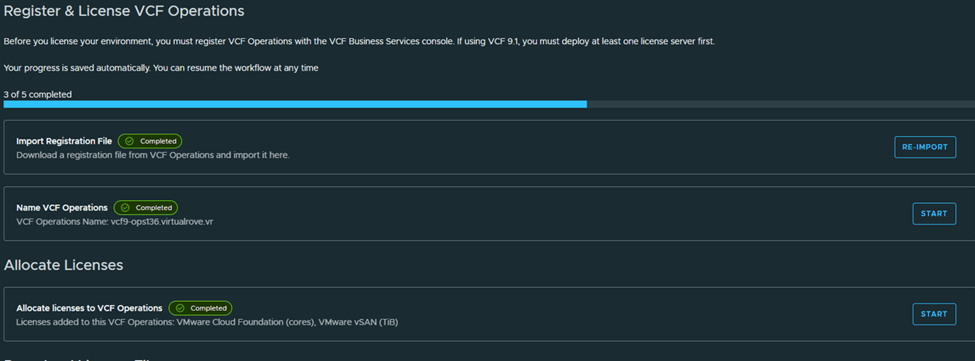
Next, Allocate licenses,
Next, Download the generated licensed file and mark as completed,
We are done on this portal here,
Back to registration page shows this,
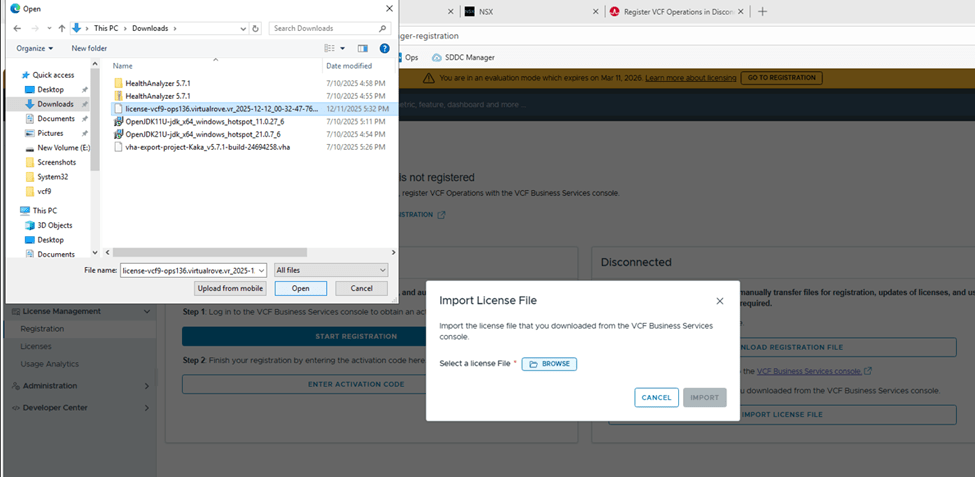
Let’s import the downloaded licensed file to our VCF operations in our environment,
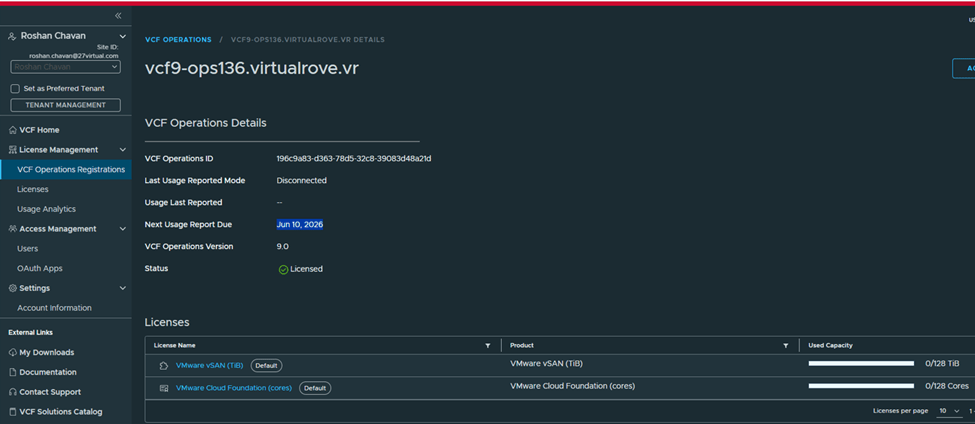
Once imported, VCF Operations shows registered,
Status: Licensed Mode: Disconnected Next usage date: You need to report license usage before this date, or else all hosts will be disconnected. VCF Operations name: shows Operations instance
We have licensed our VCF Operations instance. That’s a wrap for today! Stay tuned for the next blog—where we will talk about applying those licenses to vCenter and VSAN.
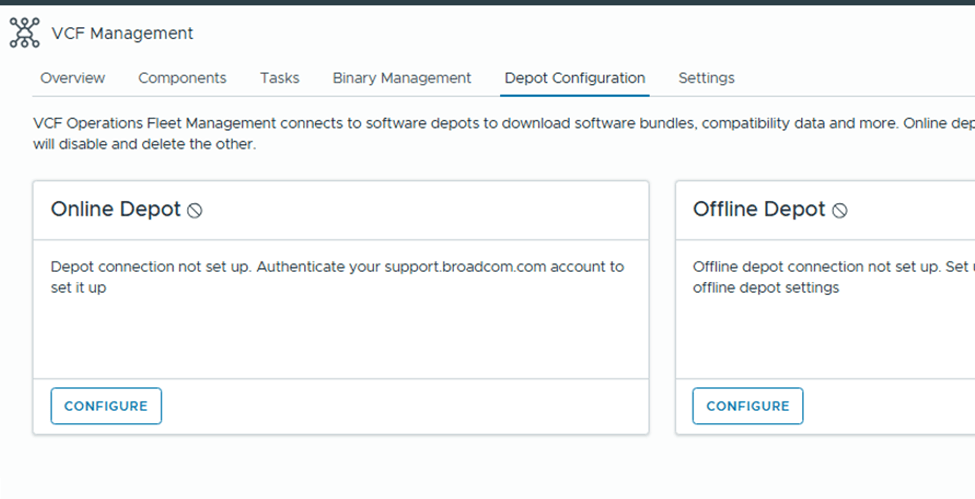
To manage the lifecycle of VCF fleet level Management components such as VCF Operations, VCF Operations for networks, VCF Operations for logs, VCF Automation & VCF Identity Broker, you need to use VCF Operations fleet management appliance. And before you can perform any of these operations, VCF Operations needs to be configured either for Online or Offline depot. This is the place where all downloaded binaries will be stored, which allows you to install, upgrade or patch any of the above-mentioned components.
Let’s dive into the lab, I have freshly installed VCF 9.0 env. Plan is to install further components in the lab,
VCF Operations> Fleet Management> Lifecycle
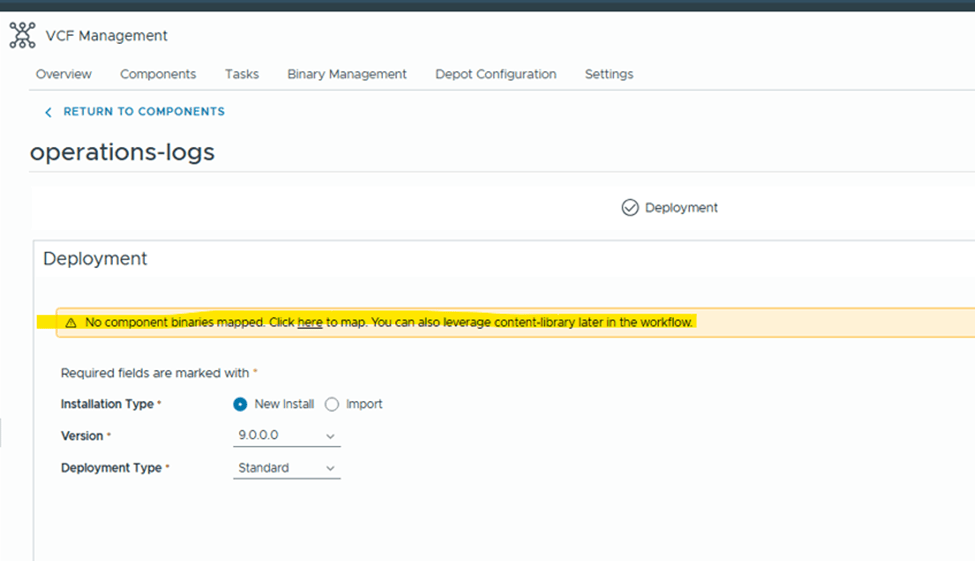
As you can see “MANAGE” option is only available for VCF Operations. And rest needs to be installed. If I click on ADD on any of those,
It says, NO component binaries mapped. Under binaries management, Depot is not configured.
Under “Depot Config”, we have 2 options
Online Depot: Use this option if the appliance has internet connectivity and you have obtained download token from support.broadcom.com portal.
Offline Depot: This option requires you to setup either web server which has access to internet or local server where you would upload all binaries manually to.
For this example, I will be configuring “Online Depot” Click on “Configure” under online depot,
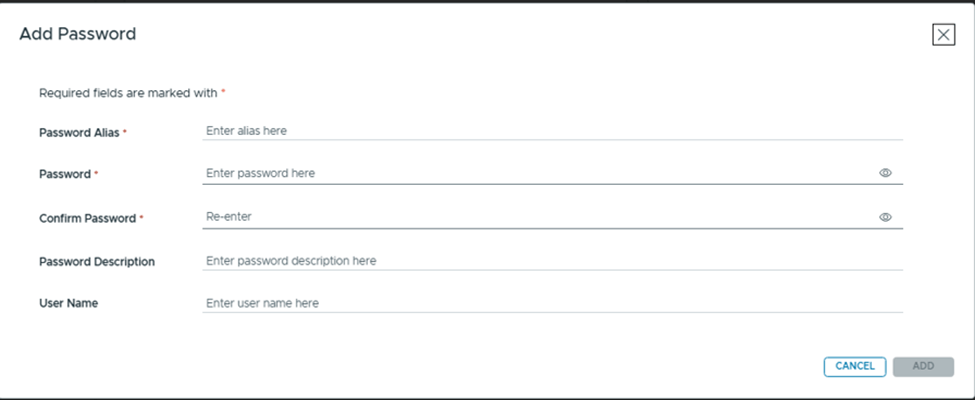
Click on the + sign on the right side,
Password Alias: Any friendly name. Password: Paste the token from Broadcom portal. (will explain later in this article on how to generate one) Confirm Password: Paste the same token again. Rest two are option fields.
Select the “Download Token” that we just created,
Accept the certificate and OK.
Online depot is now active.
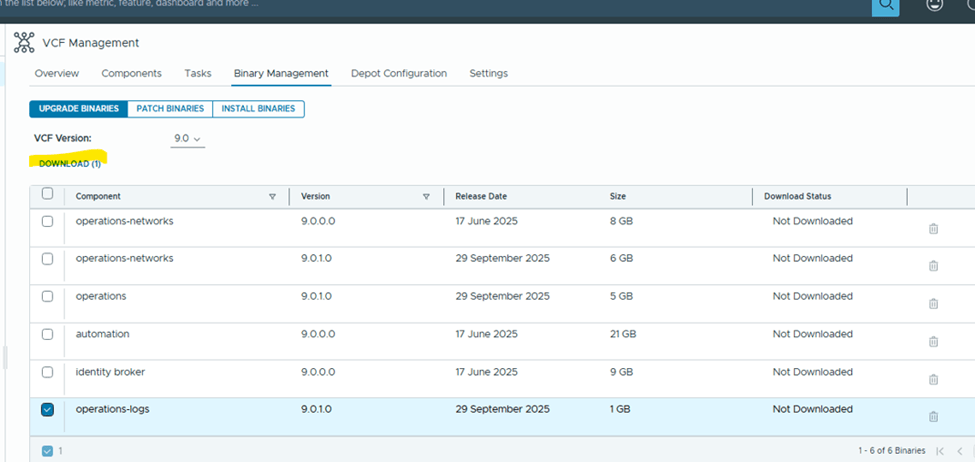
You would see all available products to download binaries for,
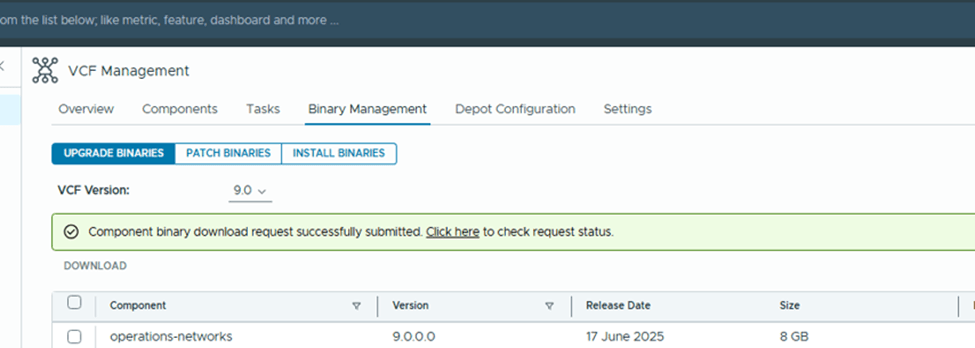
I selected “operations-logs” for testing and downloaded it,
You can monitor the status of the download under Tasks,
That’s it. You are good to download rest of the products.