We have completed 6 parts of this series. Check my earlier posts to move to Tier-0 & Tier-1 gateway.
NSX-T 3.0 Series: Part1-NSX-T Manager Installation
NSX-T 3.0 Series: Part2-Add additional NSX-T Manger & Configure VIP
NSX-T 3.0 Series: Part3-Add a Compute Manager (vCenter Server)
NSX-T 3.0 Series: Part4-Create Transport Zones & Uplink Profiles
NSX-T 3.0 Series: Part5-Configure NSX on Host Transport Nodes
NSX-T 3.0 Series: Part6-Depoy Edge Transport Nodes & Create Edge Clusters
NSX-T 3.0 Series: Part7-Add a Tier-0 gateway and configure BGP routing
NSX-T 3.0 Series: Part8-Add a Tier-1 gateway
NSX-T 3.0 Series: Part9-Create Segments & attach to T1 gateway
NSX-T 3.0 Series: Part10-Testing NSX-T Environment
Tier-0 Gateway:
This Gateway is used to process traffic between logical segments and physical network (TOR) by using routing protocol or static route. Here is the logical topology of Tier-0 & Tier-1 router.

Tier-0 & Tier-1 are logical routers. And each logical router has Service Router (SR) & Distributed Router (DR). Service Router is required for the services which can not be distributed like NAT, BGP, LB and Firewall. It’s a service on the Edge Node. Whereas, DR runs as a kernel module in all hypervisors also known as transport nodes and provides east-west routing.
With that, let’s get started creating Tier-0 router.
While creating Tier-0 gateway, we will configure uplink interfaces to TOR to form BGP neighborship. To connect your Uplink to TOR we need VLAN based logical switches in place. You must connect a Tier-0 router to VLAN based logical switch. VLAN ID for logical switch & TOR port for EDGE uplink should match. Here is the topology.

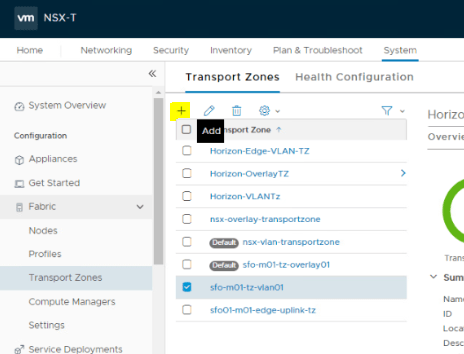
All components except TOR will be in same VLAN Transport Zone.
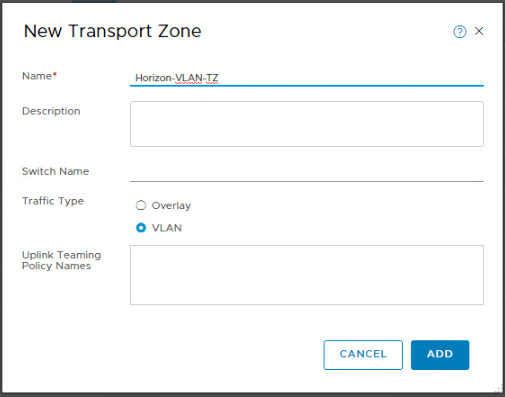
Log into NSX-T Manager VIP and navigate to Networking >Segments >Segments >ADD SEGMENT

Segment Name: Give an appropriate name.
Transport Zone: ‘Horizon-Edge-VLAN-TZ’

VLAN ID: 2711

Follow the same process to create one more segment for VLAN ID 2712.
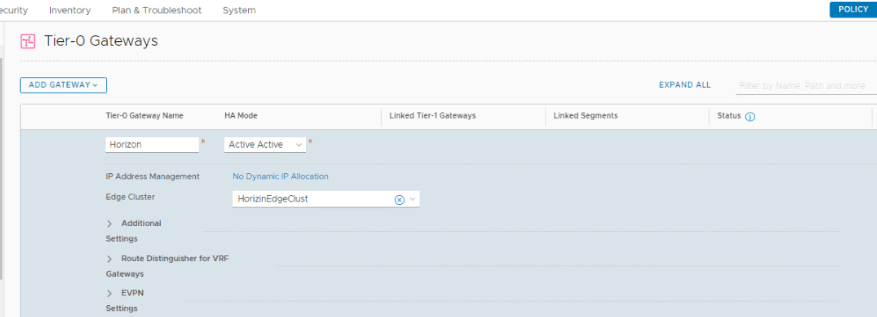
We now move to creating Tier-0 Gateway.
Log into NSX-T Manager VIP and navigate to Networking >Tier-0 Gateways >ADD GATEWAY >Tier-0

Tier-0 Gateway Name: Horizon
HA Mode: Active-Active (default mode).
In Active-Active mode, traffic traffic is load balanced aross all members whereas ‘Active-Standby’ elects active member for traffic flow. NAT, Load Balance, Firewall & VPN is only supported in ‘Active-Standby’ Mode.
Edge Cluster: ‘HorizonEdgeClust’
Scroll down to configure additional settigns.
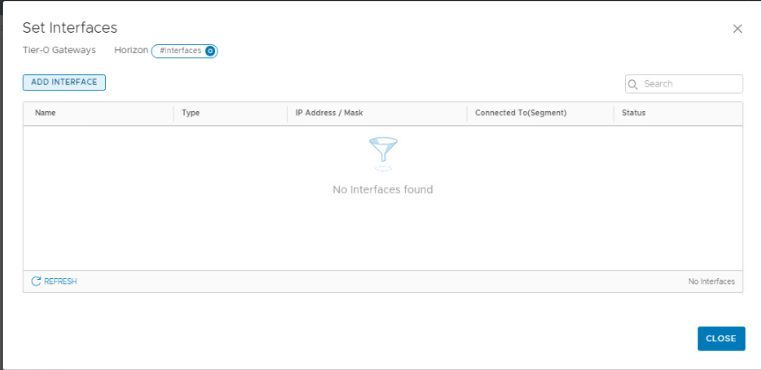
Click on ‘SET’ under ‘Interfaces’

Add Interface
Name: Give an appropriate name.
Type: External
IP Address: 172.27.11.10/24
Conneted To: Select the Segment for VLAN ID 2711
Edge Node: Edge03 (Since each edge will have different uplink)
MTU: 9000

Rest paramenter to be default. Click on Save.
Follow the same process to add an 2nd uplink interface (172.27.12.10/24) for VLAN 2712.

Status for both the interfaces will show as ‘Uninitialized’ for few seconds. Click the Refresh and it should show ‘SUCCESS’
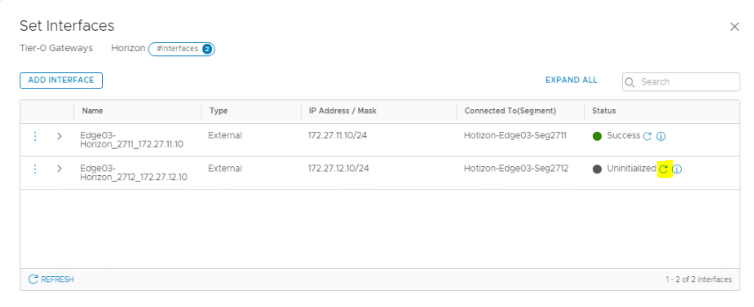
These two IP addresses will be configured on out TOR (VyOS) as a BGP neighbor.
Move to BGP section of Tier-0 Gateway to configure it further.
Local AS: 65004
InterSR iBGP: Enable (An iBGP peering gets established between both SR with Subnet (169.254.0.0/25) managed by NSX.
ECMP: Enabled
Graceful Restart: Graceful Restart & Helper.
By default, the Graceful Restart mode is set to Helper Only. Helper mode is useful for eliminating and/or reducing the disruption of traffic associated with routes learned from a neighbor capable of Graceful Restart. The neighbor must be able to preserve its forwarding table while it undergoes a restart.

BGP Neighbor: Click on Set.
IP Address: 172.27.11.1 (We have configured this as an interface IP on TOR (VyOS)
Remote AS: 65001 (Configured on TOR)
Source IP: 172.27.11.10 (Uplink IP)
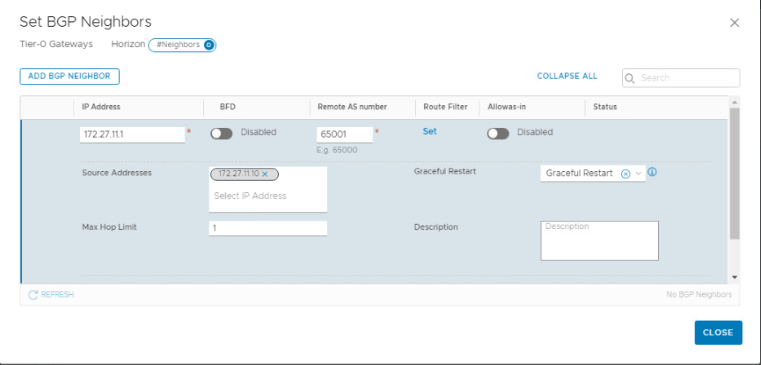
Follow the same process for IP address ‘172.27.12.1’

Both Neighbors will show status as ‘Down’ until you configure BGP on your TOR.
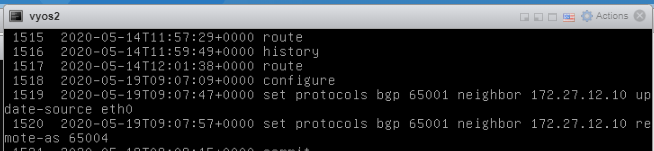
Ran following commands on my TOR to form a neighborship.
VyOS1
set protocols bgp 65001 neighbor 172.27.11.10 update-source eth4
set protocols bgp 65001 neighbor 172.27.11.10 remote-as ‘65004’

VyOS2
set protocols bgp 65001 neighbor 172.27.12.10 update-source eth0
set protocols bgp 65001 neighbor 172.27.12.10 remote-as ‘65004’
Click Refresh and it should show ‘Success’
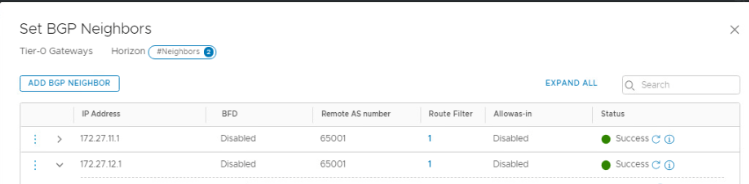
We have successfully deployed a Tier-0 Gateway and BGP has been established with TOR.
That’s it for this post. I hope you enjoyed reading. Comments are Welcome. 😊
Are you looking out for a lab to practice VMware products..? If yes, then click here to know more about our Lab-as-a-Service (LaaS).
Subscribe here to receive emails for my new posts on this website.